Communicating with people is becoming easier now. Using different online communication platforms, users can send instant messages and can do online video meetings. Zoom is a very popular secure communication software application that is used for online meetings, video conferencing, and chatting screen-sharing tasks. You can install it on all types of operating environments like Android, Windows, Linux, Mac OS, etc. Zoom application can be used on mobile phones, tablets, and desktop.
In this article, we will guide you about how to install and configure Zoom applications on Linux distribution. All steps are implemented on Ubuntu 20.04 system in this article. Let’s start this article in detail!
Prerequisites
You should have sudo command or root privileges to execute all administrative commands.
Installation of Zoom application on Ubuntu 20.04
You can install the Zoom application on Linux using three different methods:
- Install Zoom using the GUI (Graphical User Interface)
- Install Zoom from the command line
- Install Zoom using snap
In the following article, we will discuss both methods one by one in detail:
Install Zoom using the GUI (Graphical user interface)
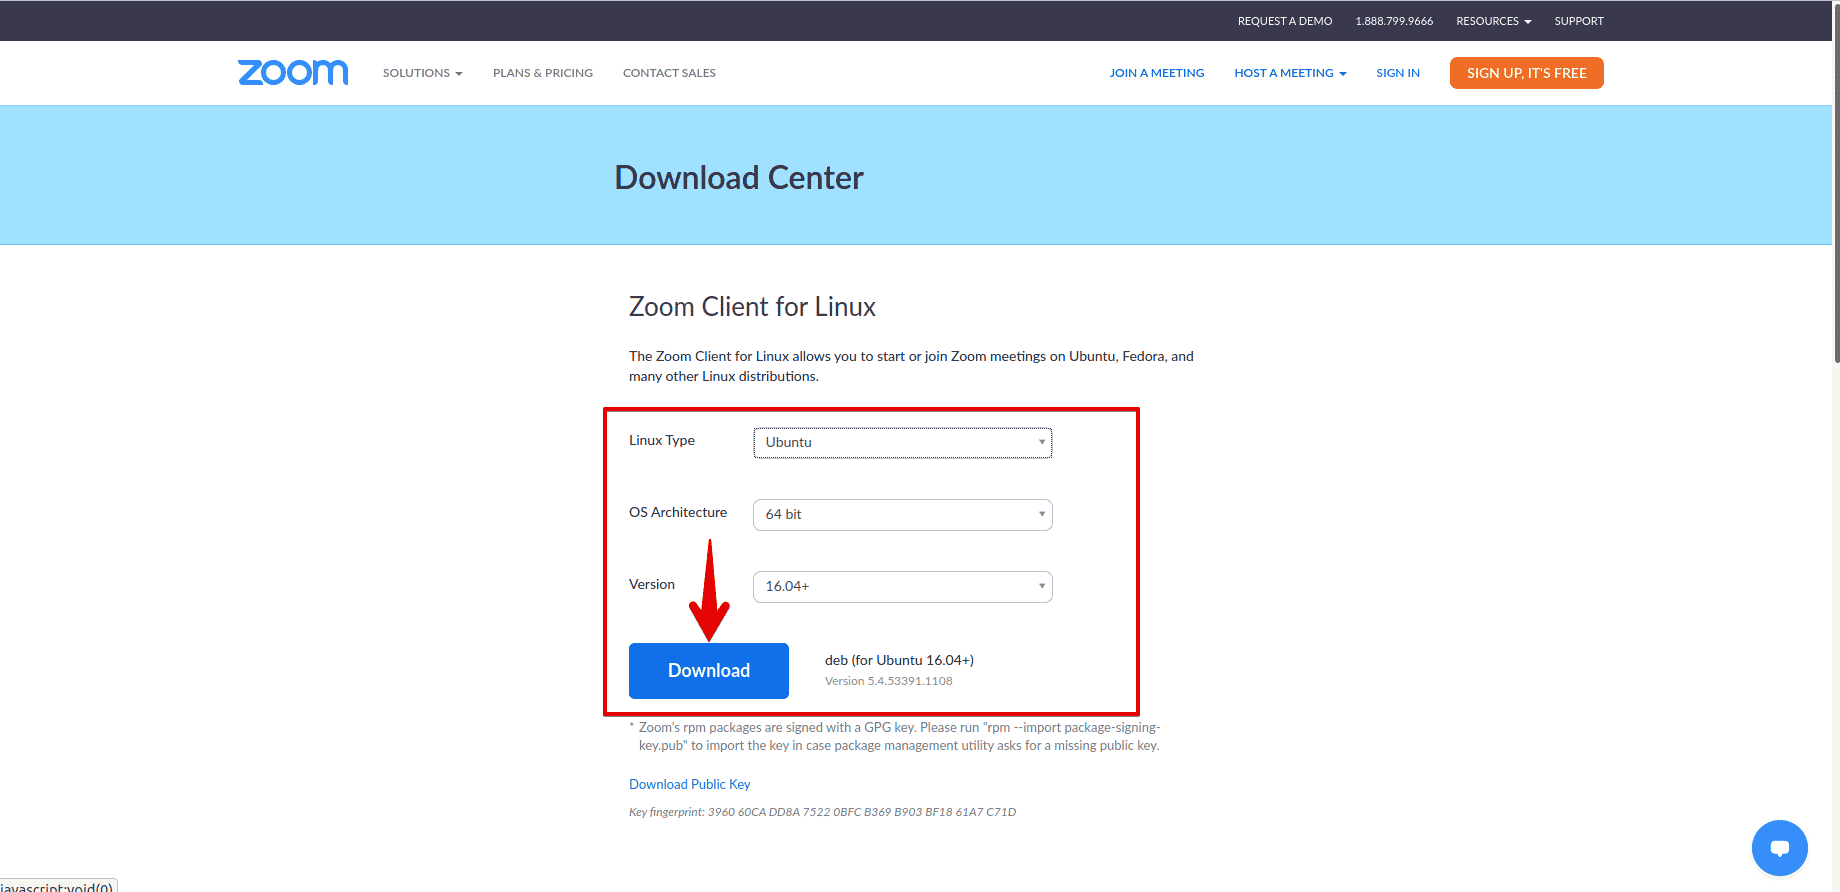
Download the zoom package using the URL https://zoom.us/download?os=linux

Select the Linux type and then architecture according to your system requirements and then click on the ‘Download’ button.
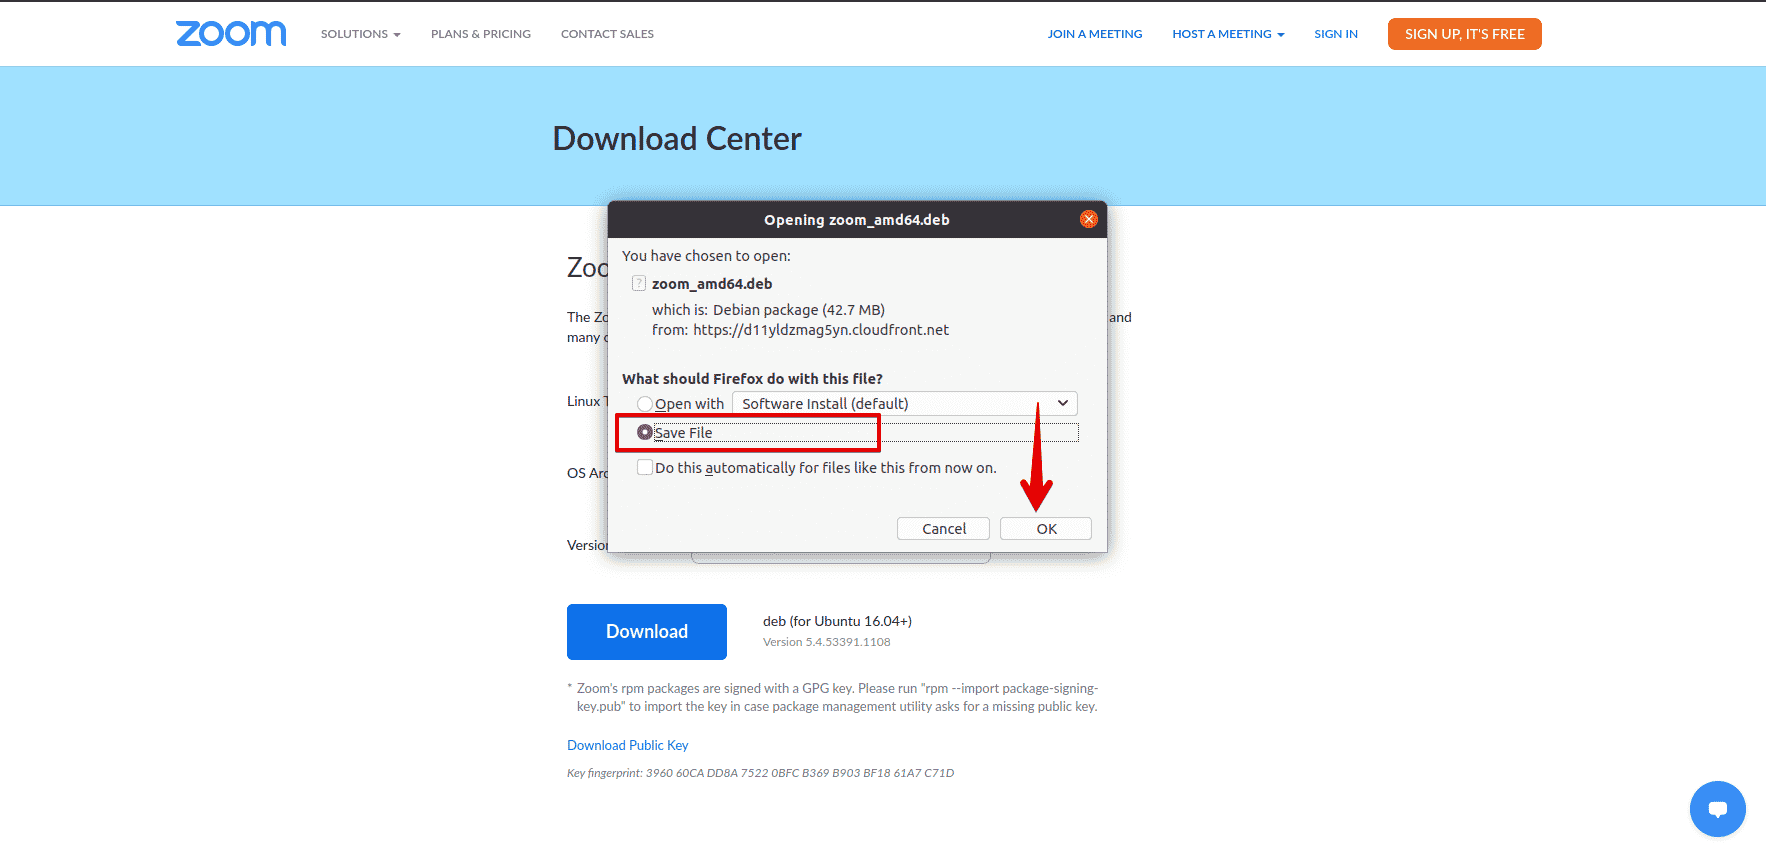
Once you click on the Download, a dialog will appear on the window where you will select the ‘Save file’ option and then click on the ‘OK’.
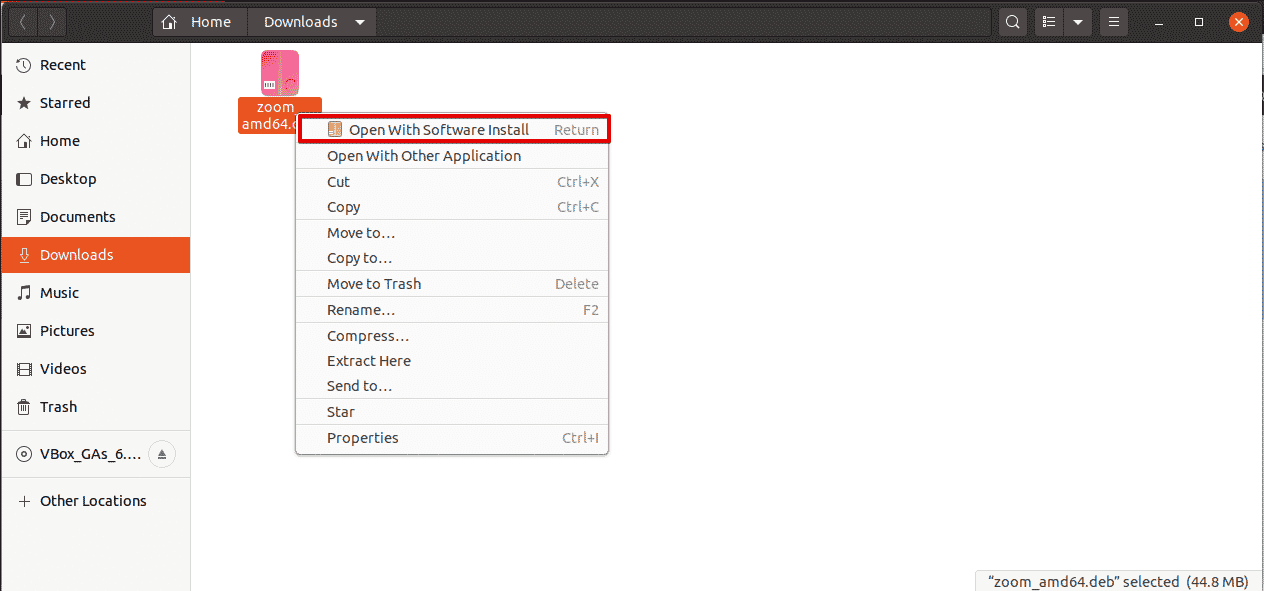
In a while, the downloading process will start. Once you have completed the download process, move into the ‘Downloads’ directory and right click on the downloaded .deb package. Further, select ‘Open with Software Install’ option from the dropdown menu.
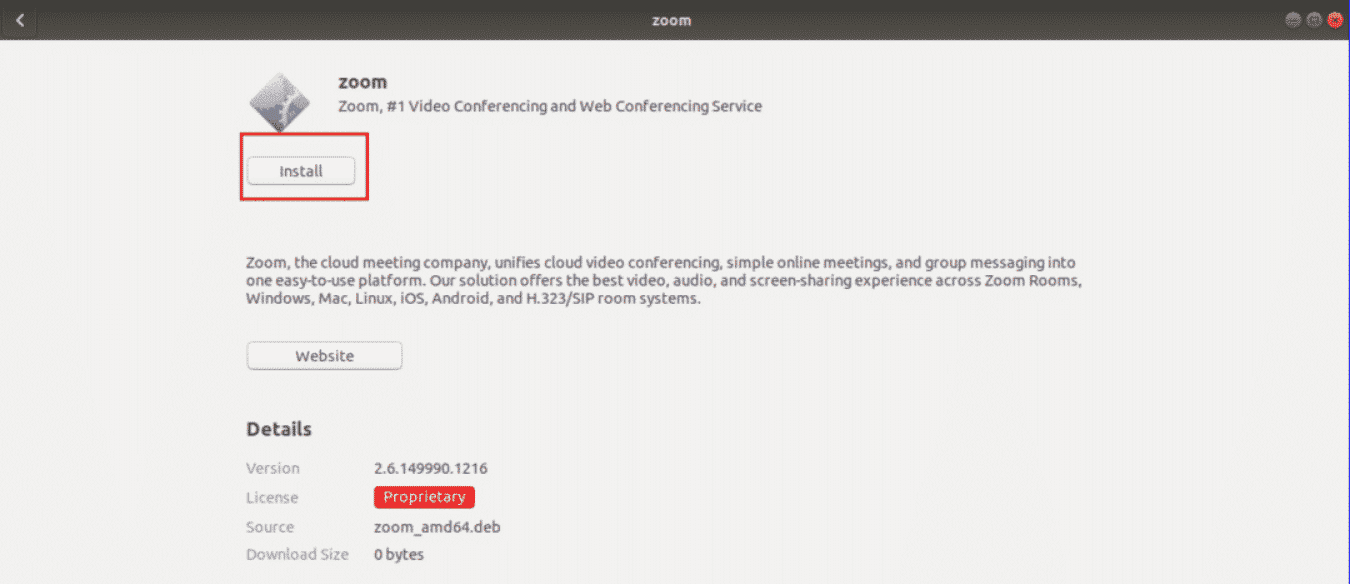
The following dialog will be shown on your desktop. Now, click on the ‘install’ button and enter the administrative password to continue the installation.
Install Zoom from the Command line
If you are a Linux user and familiar with Ubuntu 20.04 operating system. Then, you can install Zoom from the terminal in some short steps which are given as follows:
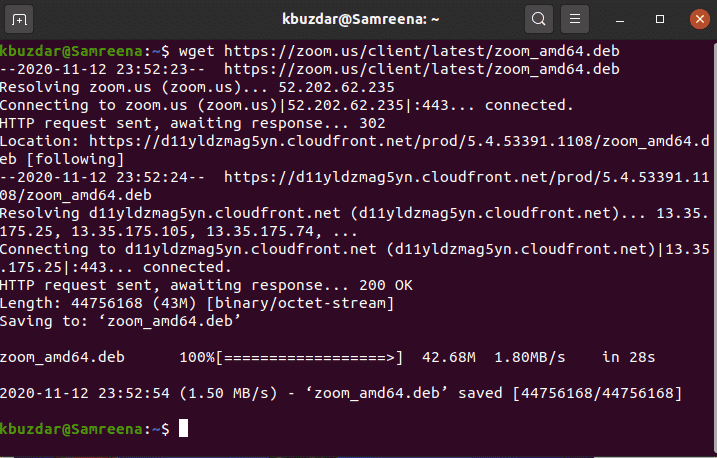
Step 1: Download Zoom .deb package
Open the terminal using the ‘Ctrl + Alt + t’ keyboard shortcut and download the latest Zoom .deb package by typing the following command on the terminal:
$ wget https://zoom.us/client/latest/zoom_amd64.deb
Step 2: Install Zoom .deb package
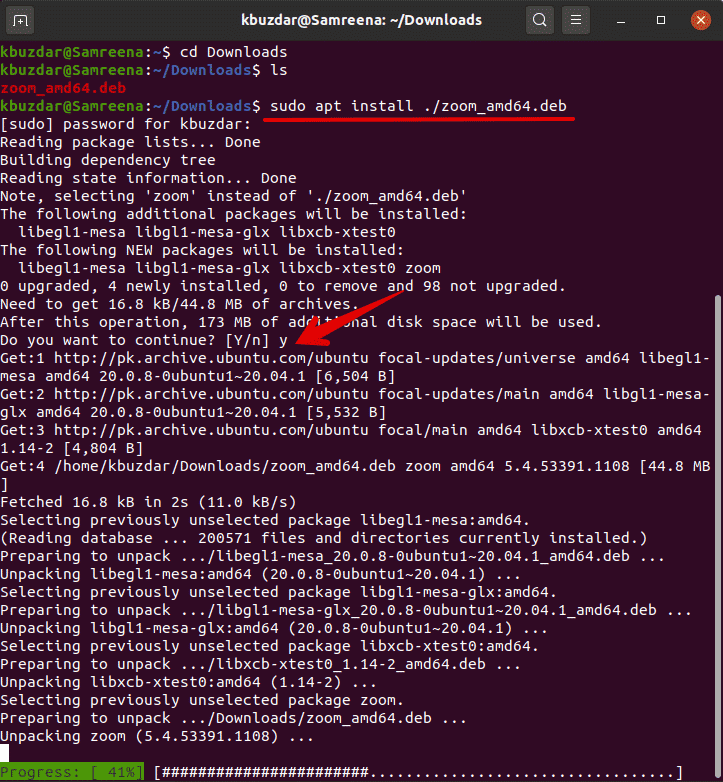
Once the download is completed, by using the following commands you will navigate the downloaded package and install Zoom on your system:
$ cd Downloads
$ sudo apt install ./zoom_amd64.deb
Step 3: Launch Zoom
Once the installation of the Zoom is application is completed, launch it by typing the following command on the terminal:
$ zoom
Or you can launch it from the application search bar. Click on the Activities section and then type ‘zoom’ in the search bar. The following result will display on your desktop:

Click on the zoom application icon and launch it. You will see the following window on your system:

Remove or uninstall Zoom
You can also uninstall this application if you don’t want to use Zoom any more. Type the following command to uninstall the Zoom app:
$ sudo apt remove zoom
Install Zoom using Snap
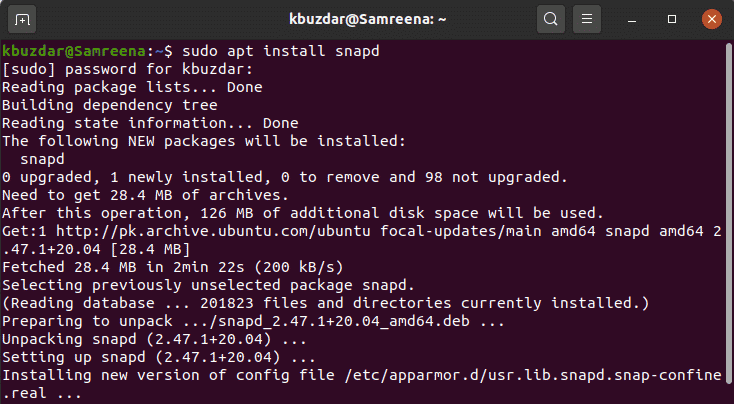
You can install zoom using the snap package manager. For this purpose, type the following command on the terminal:
$ sudo apt install snapd
Now, type the following command to install the zoom-client on your system using the snap application:
$ sudo snap install zoom-client
![]()
Using snap, you can also uninstall the zoom application by typing the following command:
$ sudo snap remove zoom
Conclusion
In this article, we have demonstrated three different methods to install zoom on Ubuntu 20.04 system. You can follow one method from all of these according to your ease and convenience. Now, you can join the zoom meeting and sign in and enjoy it.


