SSH (stands for secure shell) is a protocol used for securely accessing a remote system. It is the most commonly used protocol in Linux systems for remotely administering, managing, and troubleshooting the remote servers.
This article is about how to remotely connect to Linux Server over SSH. We will use the OpenSSH utility for remote connection over SSH.
Prerequisites
Following are some prerequisites that you must be completed for the remote connection over SSH:
- Two Ubuntu machines (for remote server and client)
- Sudo user on both server and client machine
- Remote server’s IP address or hostname
- Remote server’s port number, user name, and password
SSH Linux Server
In order to SSH Linux system, the steps involved are:
- Installing OpenSSH on remote server
- Configuring OpenSSH on remote server
- Installing OpenSSH client on the local client machine
- Accessing remote Linux server through SSH client
Note: The commands discussed here have been tested on Ubuntu 20.04 LTS.
Step 1: Installing OpenSSH on a remote server
OpenSSH is a tool for remotely connecting the system over SSH. You will need to install it on the system which you want to access over SSH.
On the remote server, open the Terminal and issue the following command:
$ sudo apt update
Then in order to install the OpenSSH server, issue the following command in Terminal:
$ sudo apt install openssh-server
Then type sudo password.
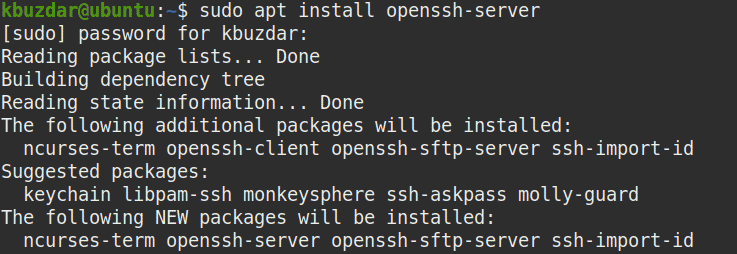
When asked for confirmation, hit y, after which the system will start the installation.
Step 2: Configuring OpenSSH on remote server
Once the installation of OpenSSH is completed, you will need to perform some necessary configurations. The SSH configuration file is /etc/ssh/sshd_config. To edit the configuration file, issue the following command in Terminal:
$ nano /etc/ssh/sshd_config
This is how the OpenSSH configuration file looks like:
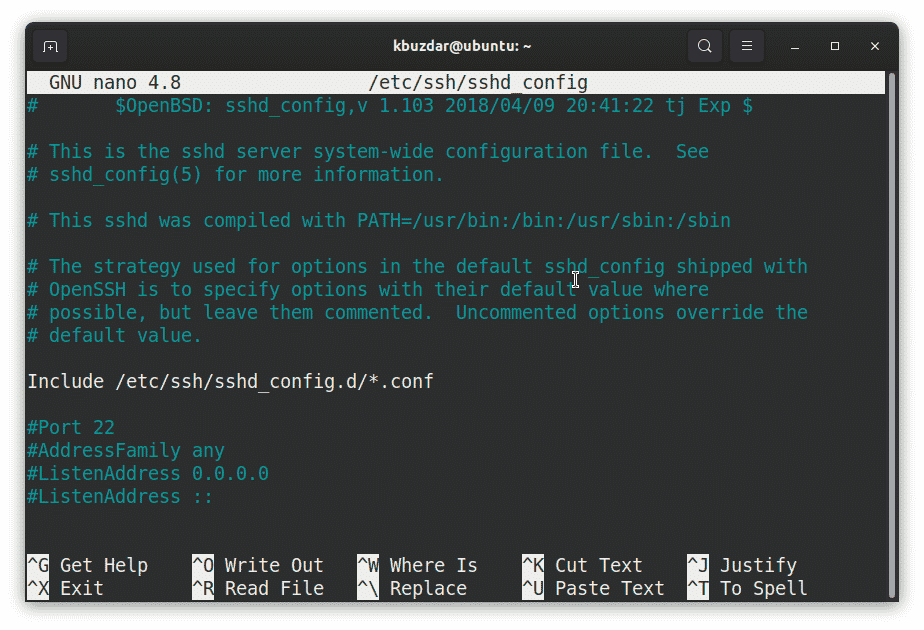
Before making any changes to this file, it is better to make a copy of the original configuration file using the following command:
$ sudo cp /etc/ssh/sshd_config /etc/ssh/sshd_config.original
We will only configure some of the options while leaving the rest of the options to default.
Changing SSH listening port
By default, OpenSSH runs on TCP port 22. However, if you want the OpenSSH server to listen on some other port (Between port numbers 1024 – 65535), you can do so as follows:
Edit the /etc/ssh/sshd_config configuration file:
$ sudo nano /etc/ssh/sshd_config
Locate ‘port 22’ in the file. You can use Ctrl+W to search it.
Replace 22 by the port number you want your OpenSSH server to listen to. Also, remove the # symbol before the line.
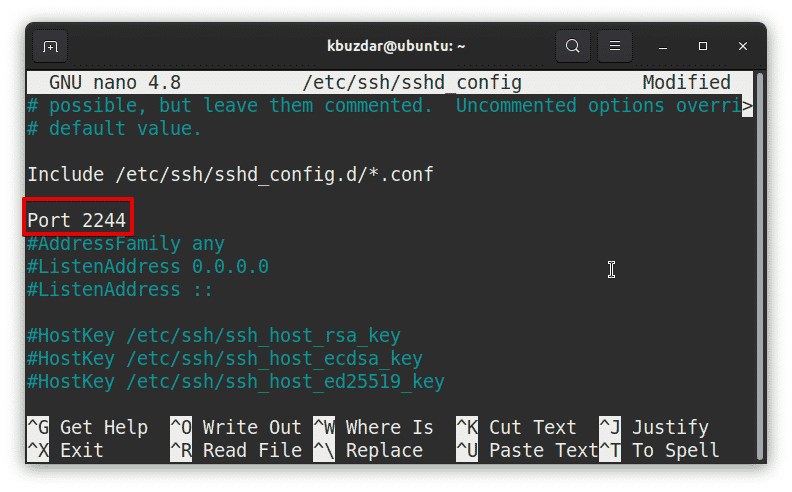
For instance, to set OpenSSH listening port to 2244, the line would be:
port 2244
Now save the configuration file.
Enabling root login on the SSH server
By default, root login is disabled in the OpenSSH server which means you cannot log in as a root user. If you need to log in as a root user to your remote SSH server, you will need to enable root login in Open SSH configuration.
Edit the /etc/ssh/sshd_config configuration file:
$ sudo nano /etc/ssh/sshd_config
Locate PermitRootLogin prohibit-password and replace it with the following line. Also, remove the # symbol before the line.
PermitRootLogin yes
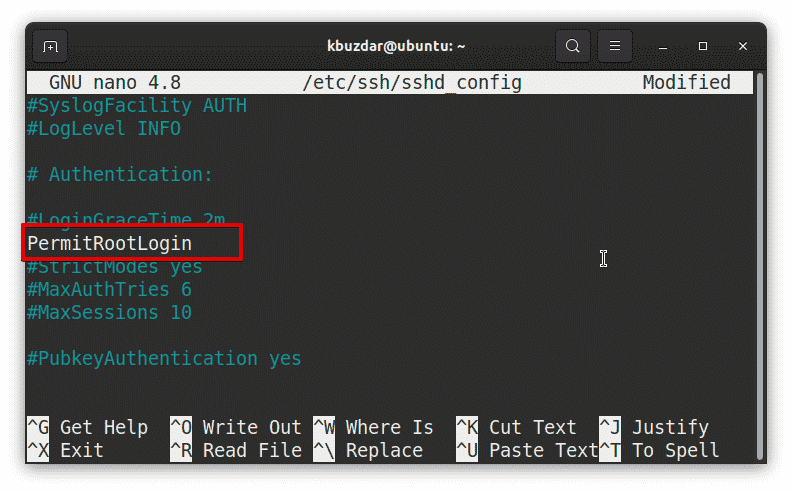
Now save the configuration file.
Reducing number of authentication attempts
By default, there are 6 authentication attempts allowed to log in to the SSH server. You can reduce these authentication attempts by changing the value of parameter MaxAuthTries.
For instance, to reduce the number of authentication attempts to 3, edit the /etc/ssh/sshd_config configuration file:
$ sudo nano /etc/ssh/sshd_config
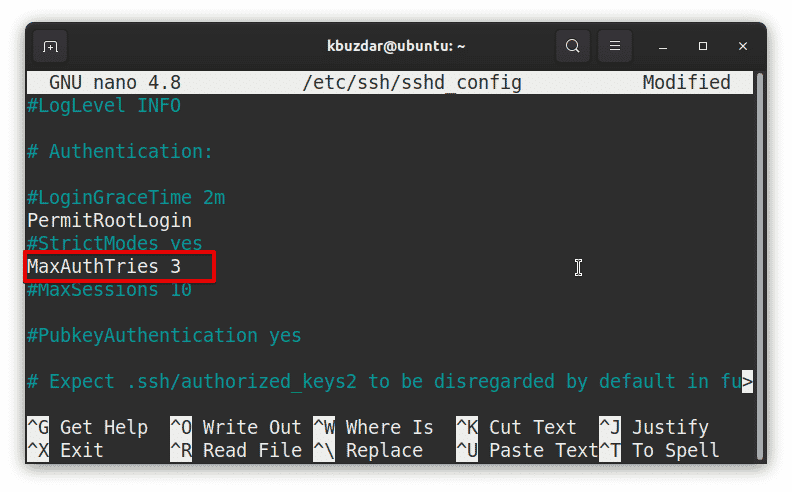
Then locate MaxAuthTries and change its value to 3.
Also, remove the # symbol before the line.
MaxAuthTries 3
Now save the configuration file.
Allow or deny certain users from logging in to SSH server
By default, all user accounts are allowed to log in to remote system via SSH. In order to allow only certain users to log in to the SSH server, edit the /etc/ssh/sshd_config file:
$ sudo nano /etc/ssh/sshd_config
Then add the following line in this file by replacing user1 and user2 with the name of the users who are allowed to log in.
AllowUsers user1 user2
Example:
AllowUsers kbuzdar tin
The above line will allow “kbuzdar’ and ‘tin’ to login via SSH.
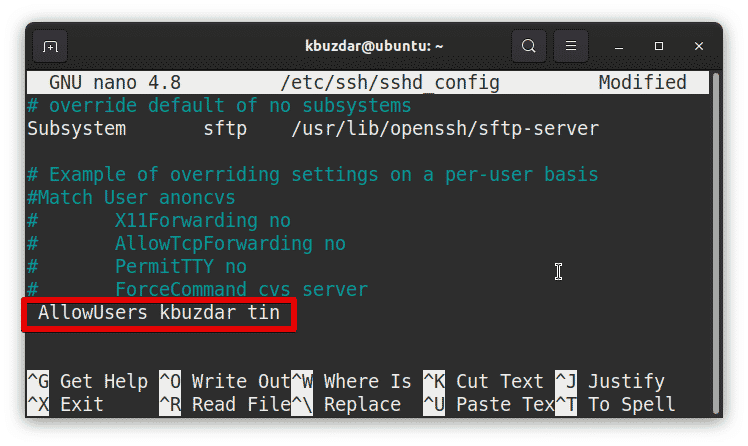
Similarly, to deny any user from accessing the SSH server, add the following line in this file by replacing user1 and user2 with the name of the users who are not allowed to log in.
DenyUsers user1 user2
The above line will allow all users except ‘john’ to login via SSH.
Now, save the configuration file.
After making any changes to the configuration file, restart SSH service by using the following command:
$ sudo service ssh restart
Step 3: Installing OpenSSH client on the local client machine
On the client machine that wants to connect to the Linux server via SSH, we will need to install OpenSSH client utility.
To install OpenSSH client, issue the following command in the client machine’s Terminal:
$ sudo apt install openssh-client
When asked for the password, provide sudo password.

When asked for confirmation, hit y, after which the system will start the installation. Once the installation is completed, you are ready to use the OpenSSH client.
Step 4: Accessing Linux server through SSH client over LAN
Through OpenSSH client, you can connect to the SSH server over LAN either using the IP address or hostname. On the client’s machine, use the following syntax to connect remote server over SSH:
$ ssh [username]@[remoteserver IP or hostname]
When prompted for the password, enter the user’s password. Once the connection is established, you will see the shell prompt for the remote server.
In our case, the remote server’s IP is ‘192.168.72.157’ and the username is ‘kbuzdar’. Therefore, the command would be:
$ ssh kbuzdar@192.168.72.157
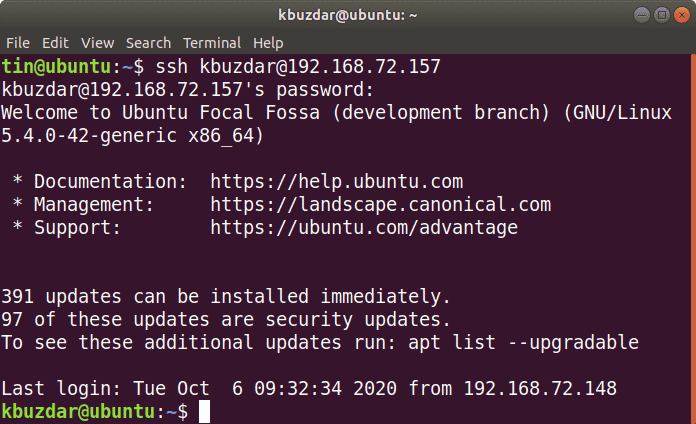
In case, you have changed the OpenSSH listening port, then the command to connect to SSH server would be:
$ ssh -p [port_number] [username]@[ip_address]
Example:
$ ssh -p 2244 kbuzdar@192.168.72.157
Accessing Linux server through SSH client over the Internet
In order to connect a remote server over the internet, you will require the Public IP of the remote server and you will also need to set up port forwarding on your router. Here are the steps to how to SSH remote server over the internet:
1. First, you will need to find out the public IP address of the remote server. To do so, issue the following command in the remote machine’s terminal:
$ curl ipaddr.pub
2. Now, you will need to set up forwarding on the router. How to setup it differs from router to router but almost all the routers allow you to do this.
3. Once you find the public IP address of the remote machine and setup port forwarding on the router, use the following syntax to SSH remote Linux machine:
$ ssh [username]@[public_ip_address]
In case, the remote server is configured to use a port number other than 22, then the syntax would be:
$ ssh -p [port_number] [username]@[public_ip_address]
This is how you can SSH Linux server. We have explained how to SSH remote Linux servers using OpenSSH utility. We have also discussed some basic configurations that you may find useful when connecting via SSH. Now you can easily manage remote Linux servers for administration and troubleshooting.

