Atom is a powerful, open-source, and highly configurable text editor developed by GitHub. It can be installed in Linux, MacOS, and Windows OS. With its higher extensibility and flexibility, you can handle any development and coding related tasks. This feature-rich text editor has a built-in package manager from where you can choose from thousands of packages to add new functionalities to your text editor. Some other features of Atom include smart auto-completion, find and replace, syntax highlighting, a lot of keyboard shortcuts and multiple panes, etc.
This article will explain how to install Atom text editor on Debian 10 system. There are following two ways to install Atom text editor on the Debian system:
- Installing Atom via apt
- Installing Atom via .deb package
Note: The commands and procedure discussed here has been tested on Debian 10 OS. You must have sudo access to install/remove the Atom text editor on your system.
Installing Atom via apt
Atom is not available in the default repositories of the Debian system. To install Atom, we will configure the Debian package manager apt to use the Atom package repositories. This will also let you update Atom once it releases a new version.
Step 1: Add the repository key
Before adding the Atom repository to your system apt sources, you will first need to add its key to apt. By doing so, your system will trust this repository.
To add the Atom repository’s key to apt’s keyring, issue the below command in Terminal:
$ wget -qO - https://packagecloud.io/AtomEditor/atom/gpgkey | sudo apt-key add -
You can see OK in the below output, which confirms the key has been added successfully.

Step 2: Add Atom’s repository to apt sources
Now you will need to add the Atom’s repository to apt sources. Execute the below command in Terminal to do so:
$ sudo sh -c 'echo "deb [arch=amd64] https://packagecloud.io/AtomEditor/atom/any/ any main" > /etc/apt/sources.list.d/atom.list'
Step 3: Update apt
After adding the Atom’s repository, you will need to update apt. Issue the below command in Terminal to do so:
$ sudo apt-get update
Step 4: Install Atom Text editor
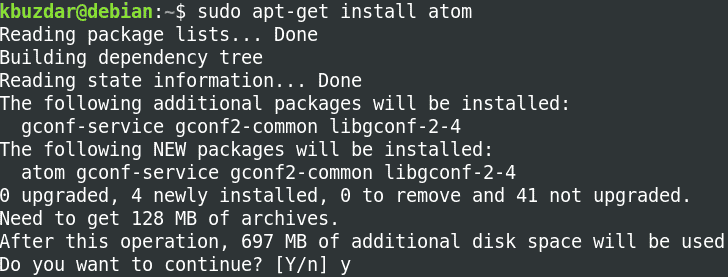
Now you can install Atom text editor using the apt package manager. Here is the command to do so:
$ sudo apt-get install atom
When the Terminal prompts you with Y/n option, press Y to carry on the installation of Atom.

It will take a while after which Atom will be installed on the system.
Installing Atom via dpkg package
Atom text editor can also be installed via its .deb package. In this procedure, we will first download Atom .deb package and then install it via dpkg.
Step 1: Download Atom .deb package
To download the Atom .deb package, go to the GitHub website and download atom-amd64.deb. Alternatively, you can also use the below command to download the Atom .deb package.
$ wget https://github.com/atom/atom/releases/download/v1.54.0/atom-amd64.deb
Step 2: Install Atom
Once the .deb package is downloaded, move to the directory where the downloaded package has been saved. Then in order to install the .deb package, issue the below command in Terminal:
$ sudo dpkg -i atom-amd64.deb

After running the above, you might receive an error about missing dependencies. If this is the case, you can install those dependencies using the below command:
$ sudo apt-get -f install
Verifying installation of Atom
To verify the installation and to view the version of Atom installed, issue the below command in Terminal:
$ atom --version

Launching Atom
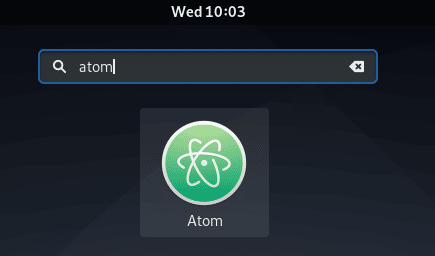
In order to launch Atom text editor, hit the super key and type atom in the search bar. Then click the Atom icon from the search results in order to launch it.

This is the default view you will see after launching Atom for the first time.

Uninstalling Atom
If you need to uninstall Atom from your system, you can do so using the below command in Terminal:
$ sudo apt-get remove atom
It will prompt you with Y/n choice. Press Y if you really want to uninstall Atom. Now Atom will be removed from your system. To uninstall the dependencies too, use the below command:
$ sudo apt-get autoremove
In this article, you have learned the installation of Atom text editor on the Debian system. We have explained two different methods using which you can install Atom on your system. Based on your preferences, you can choose any method for installation. In the end, we have also shared the method for the uninstallation of Atom, if you ever need to do so. For more information about Atom, visit the official documentation.
If you are working on other Linux distributions, visit how to install Atom in Ubuntu.


