Wine is an application that permits users to run Windows applications, programs, or games on Linux systems. As we know, Windows and Linux both are completely different environments. Thus, Windows-based applications and games cannot be run on Linux systems and vice versa. If you are working on the Linux Mint system and want to run and use Windows applications, you can install Wine. It will create a compatibility layer that will allow Windows programs to run seamlessly on Linux systems.
This guide will demonstrate the methods of installing and setting up Wine on Linux Mint.
Quick Outline
- How to Install Wine on Linux Mint
- How to Setup Wine on Linux Mint
- How to Run Windows Applications Using Wine on Linux Mint
- How to Remove Windows Applications Installed With Wine on Linux Mint
- How to Remove Wine from Linux Mint
- Final Thoughts
How to Install Wine on Linux Mint
In the Linux Mint system, you can install Wine using the following methods:
Method 1: Default Linux Mint Repository
The default Linux Mint repository contains various Wine packages that can be efficiently installed via the “apt” package manager. However, these packages are not up-to-date, which means that you will not get Wine’s latest version using this method.
To install the desired Wine package on Linux Mint from the default Linux repository, use the provided steps:
Step 1: Update System Repository
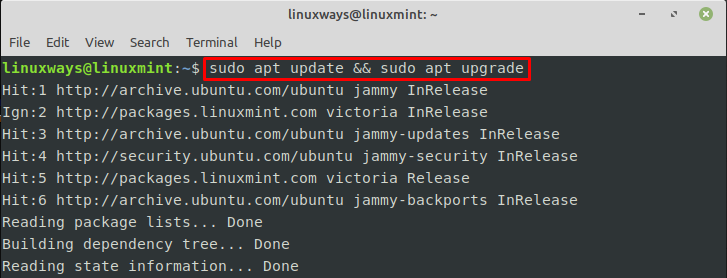
Before installing Wine on your system, use the provided command to update the Linux Mint packages:

Step 2: Enable 32-bit Architecture
If you are working on the 64-bit architecture system and want to install the 32-bit Windows applications on your Linux system using Wine, then you will have to enable the 32-bit architecture. Execute the provided command to do so:

Step 3: Install Wine on Linux Mint
Then, install Wine through the following command:
Here, the “-y” option is utilized for the direct installation without any confirmation:

Step 4: Verification
To verify whether the Wine is installed or not, check its version using the provided command:
As you can see, the older version(as the latest is 8.0.2) of Wine has been installed:

Method 2: Official WineHQ Repository
If you want to get the latest version of Wine, you can install it from the official WineHQ repository. Therefore, it is required to add/import the WineHQ official repository to the system. This will install Wine‘s latest version and also update it automatically through the package manager on your system whenever a new release is introduced.
To install Wine from the official WineHQ repository, follow the given instructions:
Step 1: Update and Upgrade System Repository
First, update and upgrade the system’s packages using the provided command:

Step 2: Enable 32-bit Architecture
Then, enable 32-bit architecture if you are working on the 64-bit architecture system through the provided command:

Step 3: Make a Directory/Folder For GPG Key
Next, utilize the provided command to create the directory with the specific permissions for storing the GPG key:
Here:
- “-p” flag is used to create the parent directories if they do not already exist.
- “-m755” option specifies the directory’s permissions. It means the owner has all the permissions (i.e. write, read, and execute) while the other users have restricted permissions (i.e. read and execute).
- “/etc/apt/keyrings” is the directory path where the new “keyrings” directory will be created.

Step 4: Download the Wine GPG Key on the System
Then, download the WineHQ GPG on your system for the Wine’s repository authenticity using the following command:
The above command will download the WineHQ GPG key and save it in the “/etc/apt/keyrings/winehq-archive.key” directory:

Step 5: Add WineHQ Repository on Linux Mint
Execute the given command to add the WineHQ repository to your Linux Mint system:

Note: If you are working on Linux Mint 20, use the provided command instead of the above-mentioned command:
Step 6: Update System
After that, update the system repository to implement the changes:

Step 7: Install Wine on Linux Mint
Now, install Wine’s latest stable and reliable version on your system through the provided command:

Note: Wine also has staging and development versions. The Wine Staging version includes experimental features and improvements that are still in the testing stage and the Wine Development version is primarily for developers to try out the latest features and contribute to Wine’s development.
If you want to install the development or staging release, replace the “winehq-stable” with “winehq-devel” and “winehq-staging”, respectively in the above command.
Step 8: Verification
Finally, check the Wine’s version to ensure that it is installed on the system:
It can be observed that the Wine’s latest version has been efficiently installed:

How to Setup Wine on Linux Mint
Once the Wine is successfully installed on your Linux Mint system, you need to do some configuration. To configure the Wine’s Environment, run the below-listed command:
Subsequently, the dialogue box will be opened, and it will ask you to install “Mono Installer”. Tap on the “Install” button to add it to the Wine:

After that, the Wine configuration window will open up. You can configure different settings, such as Drivers, Audio, Applications, etc. Here, we are configuring the Windows version and setting it to “Windows 10”:

After configuring the desired settings, click on the “Apply” and “OK” buttons to save changes:

How to Run Windows Applications Using Wine on Linux Mint
As Wine has been installed and set up on your system, you can now use it to run the Windows application. For this purpose, you will have to download the EXE file of the desired Windows application on your system and then install it using Wine. For instance, if you want to install the “Notepad++” Windows application through Wine, follow the provided steps:
Step 1: Download Notepad++ Installer
First, navigate to the official Notepad++ website and download its EXE file on your system:

Step 2: Navigate to Downloads Directory
Then, redirect to the “Downloads” folder through the terminal and view the downloaded file:
ls
As you can see, the “Downloads” directory contains the “Notepad++” installer file:

Step 3: Install Notepad++ on Linux Mint Using Wine
To install the Notepad++ Windows application on your Linux Mint system, use the “wine” command and specify the installer file name:
Subsequently, the installation of Notepad++ has been started as seen below:

Note: If you have installed the Windows application that has a “.msi” file extension instead of “.exe”, utilize the “wine msiexec /i <file-name>” command.
Alternatively, you can right-click on the installer file and choose the below-highlighted option to install it using Wine:

Step 4: Install/Set up Notepad++ on Linux Mint
Now, install Notepad++ on your system. Tap on the “Next” button to continue:

Choose the installation location and hit the “Next” button:

Click on the “Install” button to install Notepad++ on the system:

Tap on the “Finish” button after the installation has completed:

Subsequently, Notepad++ has been launched as seen below. This indicates that Notepad++ has been installed successfully using Wine:

How to Remove Windows Applications Installed With Wine on Linux Mint 21
If you want to remove or uninstall the specific Windows application that was installed with Wine, try out the provided steps:
Step 1: Launch Add/Remove Program Window
First, execute the “wine uninstaller” command to launch the “Add/Remove Program” window:
By doing so, the “Add/Remove Program” window has been launched as seen below:

Step 2: Choose Windows Application for Removal
Then, choose the desired Windows application that is needed to be removed/deleted from the system and tap on the “Modify/Remove” button. Here, we have selected the “Notepad++” application to remove it:

Step 3: Uninstall the Windows Application
Now, tap on the “Uninstall” button to remove or uninstall it:

Upon doing so, the “Notepad++” has been uninstalled as seen below. Hit the “Close” button to exit/close the window:

How to Remove Wine from Linux Mint
If you do not need to use Wine anymore, you can simply remove it from your Linux Mint system, by using the provided command:

You should also remove the Wine repository from your system with the help of the given command:

That was all about installing, setting up, and uninstalling Wine on Linux Mint.
Final Thoughts
Wine is a tool that enables users to run several Windows applications on their Linux Mint system. You can install Wine on your Linux Mint system from the default Linux repository or the official WineHQ repository. However, if you want to get the Wine’s latest version, use the official WineHQ repository method. It will permit you to install, run, and manage your desired Windows application on the system. This write-up illustrates the ways to install, set up, and remove Wine on the Linux Mint system.
I am a technical writer with a knack for learning and exploring new technologies. As a Computer Science Graduate, my expertise lies in the fundamentals of Programming languages and Linux OS. I strive to provide users with in-depth and informative articles that can help them understand the core concepts of modern technologies.


