Ubuntu, being a predominantly Linux operating system, has several programs to assist us in completing various tasks. It’s crucial to understand how to update your computer’s IP address since it allows you to transport any sort of data over a network. In this post, we’ll go through the two distinct methods for changing IP addresses on your Ubuntu system.
An IP address, or Internet Protocol address, is a numeric address assigned to various computers and networked devices that use the Internet Protocol. An IP address is used to both identify and determine the location of a machine. Every IP address on the network is unique, allowing for better communication between all connected devices. There are two sorts of IP addresses: public and private (public and private). Your public IP-address is used to communicate via the Internet in the same manner that your physical address is used for postal mail. In the other hand, every device on a local network is given a private IP address that is unique within its sub-network.
Another distinction between IPv4 and IPv6 protocols may be made. IPv4 is the most used IP format, consisting of a four-part structure with four bytes separated by dots (e.g., 192.168.1.3). Apart from the fact that as the number of devices increases, it becomes increasingly difficult to keep track of them all, IPv4 may soon run out of addresses. That is why, in contrast to IPv4, IPv6 was invented.
Change IP Address in Ubuntu
There are two ways through which your IP address can be changed in Ubuntu:
- Change IP address Using Command Line Method
- Change IP address Using GUI (Graphical User Interface) Method
A brief detail of both methods is explained below:
How to Change IP Address Using Command Line Method
The Command-Line method is a simple and mostly used way in Linux to change your IP address in Ubuntu. First, run the mentioned below command to check active network interfaces:
$ ip link |

After listing network interfaces, open the file named as “/etc/netplan/*.yaml” in nano editor by using the command mentioned below:
$ sudo nano /etc/netplan/*.yaml |

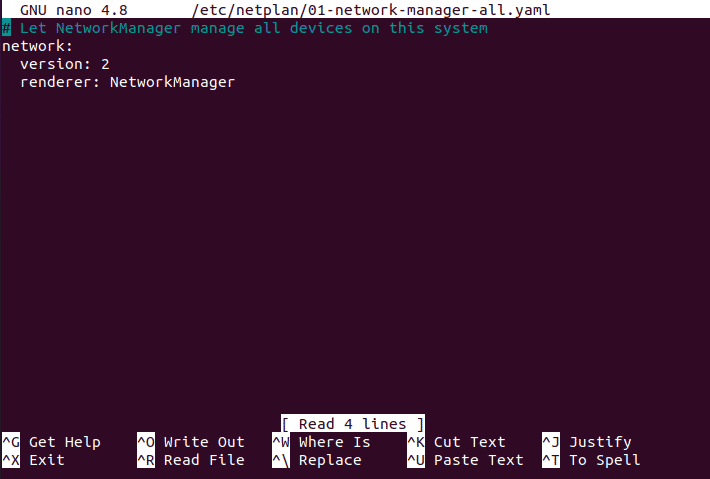
“/etc/netplan/*.yaml” file will open a new page having following information:

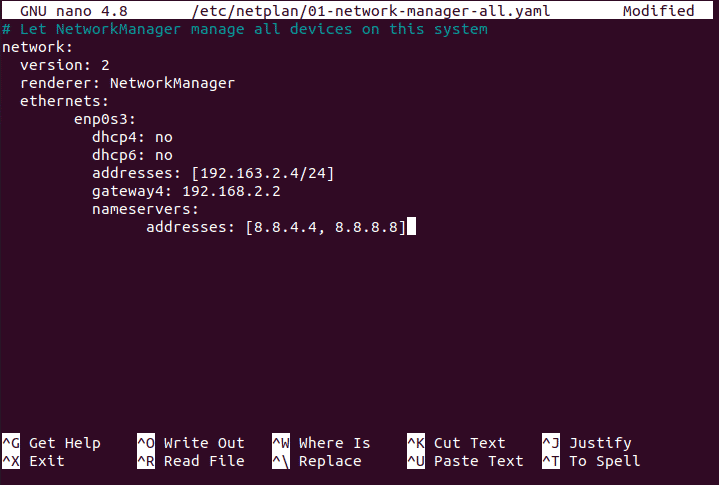
In the “/etc/netplan/*.yaml” file write the mentioned below code in order to change the IP address:
network: version: 2 renderer: networkd ethernets: enp0s3: dhcp4: no dhcp6: no addresses: [192.168.2.2/24] gateway4: 192.168.2.2 nameservers: addresses: [8.8.4.4, 8.8.8.8] |
After writing the code, press “CTRL+O” to save the changes, and to apply the settings run the mentioned below command:
$ sudo netplan apply |

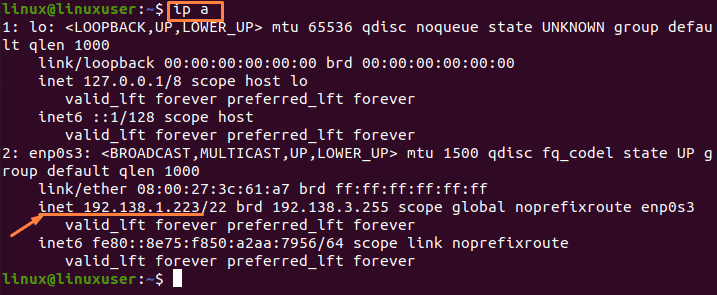
Now, run the mentioned below command to check the modified IP address of the “enpos3”
$ ip a |
By running this command, you can get a modified IP address of any network interface on your Ubuntu system.

How to Change IP Address Using GUI (Graphical User Interface) Method
If you don’t know how to use the command line or you are facing any difficulty in the application of commands, you can also check IP addresses by another method.
Mentioned below are the steps to change IP-address using GUI.
Step 1: Application Menu (Settings)
Open the Ubuntu Applications Menu which is provided in the left corner of the screen (denoted by the nine dots symbol) and then search for “Settings” option and click on the icon:

Step 2: Network Settings
Settings Menu will be shown after clicking the “settings” icon. In settings options, go to “Network”.

Step 3: IP Address Details
When you press the “gear icon” given after your connection, a window will get opened that contain more setting and information of your connection with network and IP-address. In order to change IPv4 address, click on the “IPv4” tab.

Step 4: Changing IP Address Details
After selecting the IPv4 tab, select the method as “manual” enter details of your own choice and then click on the “apply” button.

Step 5: Applying New Settings
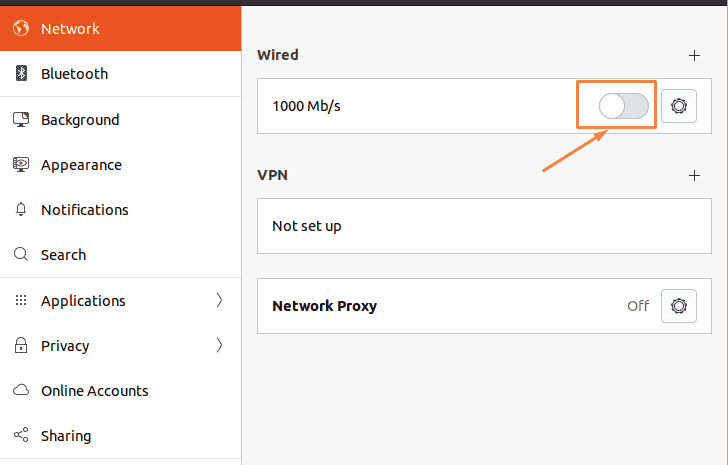
After clicking on the “apply” button, in order to apply new IP settings, turn the switch OFF and ON.

Step 6: Checking New Settings
In order to check whether new settings are applied or not, click on the “gear icon” and then go to the “details” option provided in the network settings icon and new IPv4 address settings will be obtained.

Conclusion
In this article, the basic overview of IP addresses, their types, and the contrast between the IPv4 and IPv6 protocols is being provided. The two different ways through which you can change your IP address in Ubuntu Linux are being discussed in this article as well. These approaches include the command line approach and the GUI approach.


