The sudo command in Linux allows you to run all those commands which require root privileges. Without root privileges, a normal user is very limited in what they can do in Linux. But, practically you cannot give every user all privileges to do whatever they want to do with a system. However, there are some users whom you want to assign root privileges to perform all or a limited number of duties. The sudo command lets you do this by allowing a user to run all or a specific set of commands as a root user.
To add a user to sudoers (list of users who can run sudo commands) on Ubuntu, there are three different methods including both the command line and the GUI. We will explain each method with example. If you are interested in how to add a new user in Linux, visit our post on How to How to Add and Remove Users on Ubuntu 20.04.
Note: For the demonstration, we will be using the Ubuntu 20.04 LTS. You can use the same procedures on other Linux distributions that use sudo.
Check If a User Has Sudo Rights
To find out if a user has sudo rights, you will need to check if it is a part of the group “sudo”. You can check it using the command below in the Terminal:
$ groups <username>
If the user has sudo rights, you will see the “sudo” group in the output.
For instance, to check if a user named “ummara” has sudo access, the command would be:
$ groups ummara
The following output shows the user “ummara” is a member of sudo groups and therefore has sudo privileges.

Add a User to Sudoers on Ubuntu
There are different methods to add a user to sudoers on Ubuntu. Remember, you will need to run the commands described here as a root or sudo.
Method #1 By Adding User to the sudo group (Command Line)
To add a user to sudoers and assign it sudo privileges, use the usermod command as follows:
$ sudo usermod -aG sudo username
This command will add user to a group named “sudo”. The members of sudo group are allowed to run the sudo commands.
For instance, to add a user named “ummara” to sudoers, the command would be:
$ sudo usermod -aG sudo ummara
Enter the sudo password, after which the user will be added to the sudo group. To confirm the user is now in the sudoers, issue the command below:
$ groups <username>
The groups command tells which groups a user belongs to.
In our scenario, the command would be:
$ groups ummara
In the output, you should see the sudo group.

Now the user will be allowed to run the sudo commands, like we have tried the “sudo apt update” command:

Method 2: By Adding User to the Sudoers File (Command Line)
Another method to assign sudo access is by adding the user to the sudoers file. You can edit the sudoers file as follows:
$ sudo visudo
Enter your password. Now scroll down the bottom of the file and add an entry in the following format:
username ALL=(ALL) NOPASSWD:ALL
For instance, we want to add a user named “ummara” to sudoers. For this purpose, we have appended the below entry in the sudoers file:
ummara ALL=(ALL) NOPASSWD:ALL
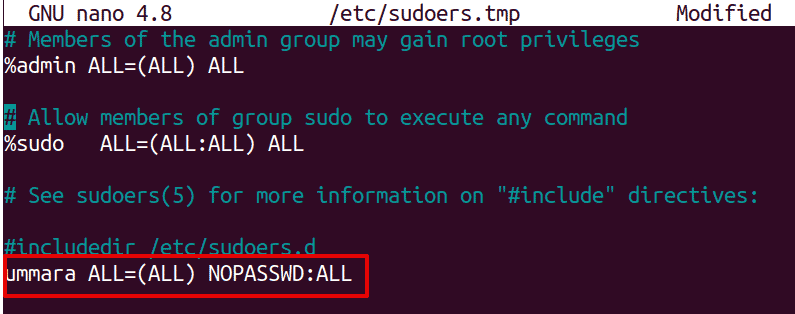
Once done, save and close the sudoers file. Now the user will be allowed to run all commands as sudo.
After editing the sudoers file, you can check if its syntax is correct. Issue the below command to do so:
$ sudo visudo -c
If the syntax is right, you will see this output:

To confirm the user is now in the sudoers, issue the command below:
$ groups <username>
You should see the sudo group in the output.

Limiting Root Access with Sudo
In certain scenarios, there is a requirement for users to perform a certain task that needs root privileges. However, it is not reasonable to assign them all privileges. With sudo, you can limit the root access to commands they can use. For instance, you want a user named “ummara” to give access only to the “useradd” and “adduser” command. In this case, edit the sudoers file using the command below:
$ sudo visudo
Then scroll down the file and add the below entry:
ummara ALL=(ALL) NOPASSWD: /usr/sbin/useradd,/usr/sbin/adduser
Save the sudoers file and exit.

Now the user “ummara” will be able to use only useradd and adduser commands.

However, if “ummara” attempts to run any other sudo command, it will be refused.

Method #3: By Changing Account Type to Administrator (GUI)
There is another way through which you can add a user to sudoers from the graphical user interface. Here are the steps to do so:
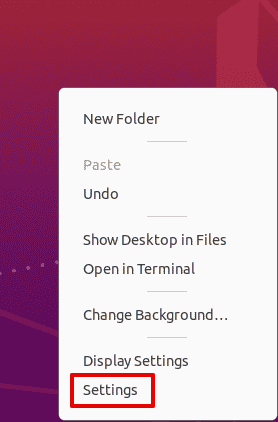
1. Open the Settings utility by right-clicking the desktop and choosing Settings from the menu.
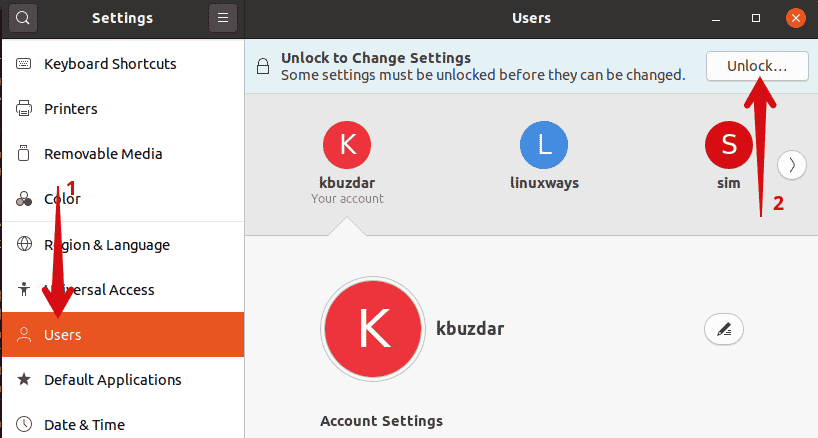
Then from the Settings window, select the Users tab. Then unlock the user settings by clicking the Unlock button.
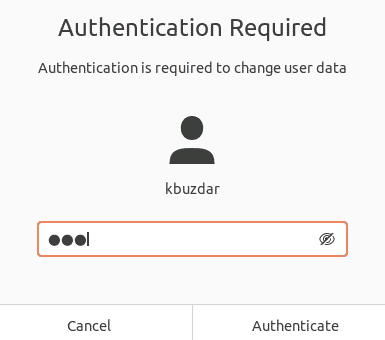
Now enter your password for authentication and click Authenticate.
Now select the user to whom you want to give sudo access. Then under the user Account Settings, switch the toggle button in front of Administrator to on state as shown in the screenshot below.
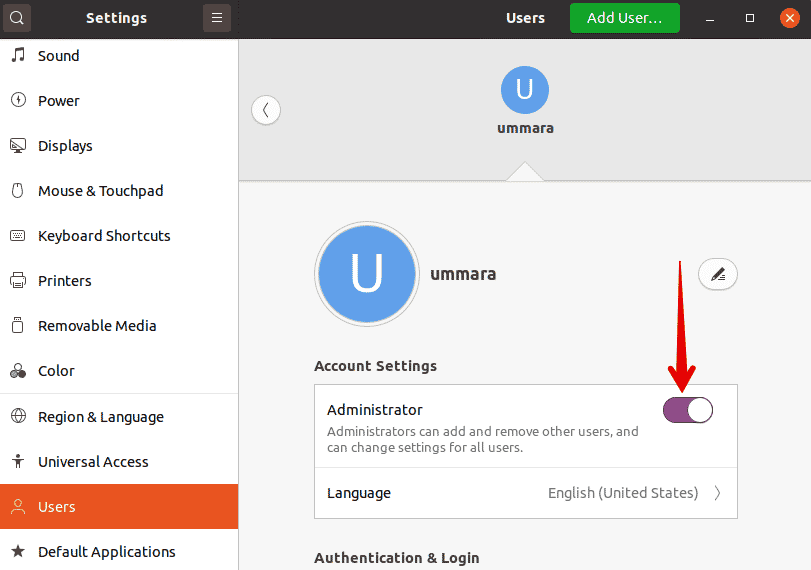
By doing so, the user will be added to the sudo group and it will be able to use all the sudo commands.
Remove User from Sudoers
To remove a user from sudoers, use the following command:
$ sudo gpasswd -d <username> sudo
This command will remove the specified user from the sudo group and hence it will no longer be able to run the commands as a root user.
To confirm if the user has been removed from the sudoers, run the command below:
$ groups <username>
There should be no “sudo” group in the output.
Sudo is a very handy tool for system administrators that allow them to provide root access to a user with granularity. Here, we have covered how to add a user to sudoers using different methods, limit root access with sudo and remove a user from sudoers.


