Introduction
An IP address is a 32-bit identifier given to any computer system when it joins a private or public network (Internet). Private IP address is in the form of 10.x.x.x, 192.168.x.x , or 172.16.x.x. It is assigned statically by a system administrator or through a DHCP server. In this article, I will discuss how to find the private IP address of your Ubuntu 20.04 LTS system using both GUI and command line.
Let’s move ahead without wasting any further time.
Finding Private IP in Ubuntu 20.04
Method 1: Using the Graphical User Interface (GUI)
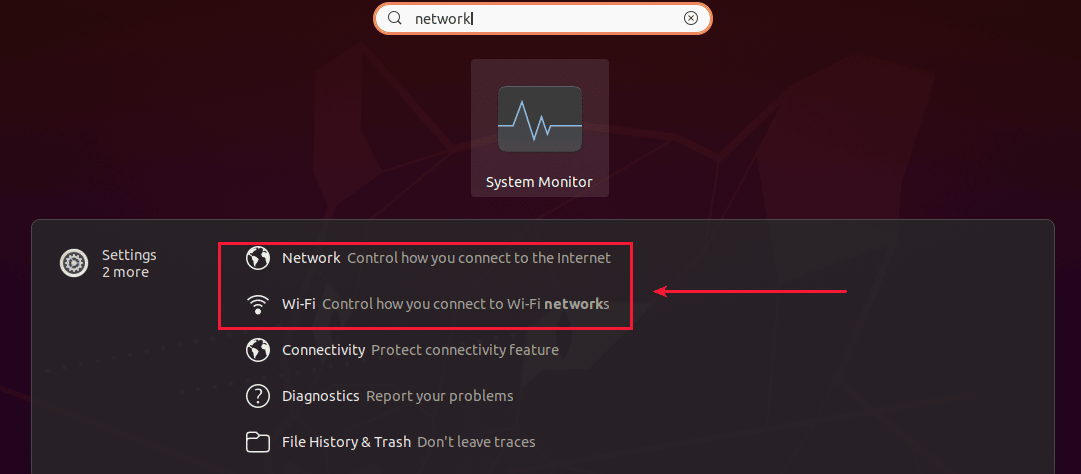
Go to “Applications” and search for a network. Click on the network If you are connected through ethernet or click on Wi-Fi if you are using a Wi-Fi connection.
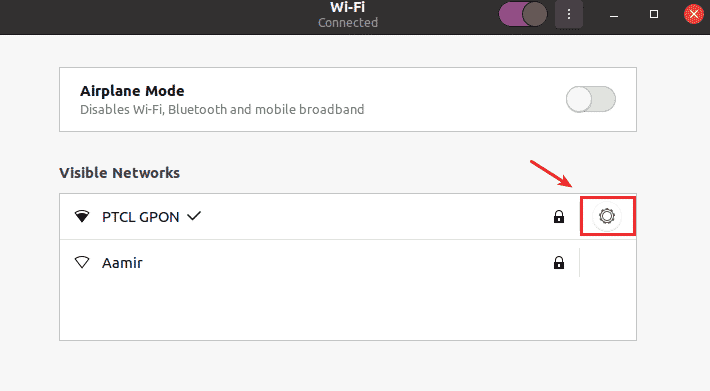
Go to your connection and click on the gear icon to go to your connection information.
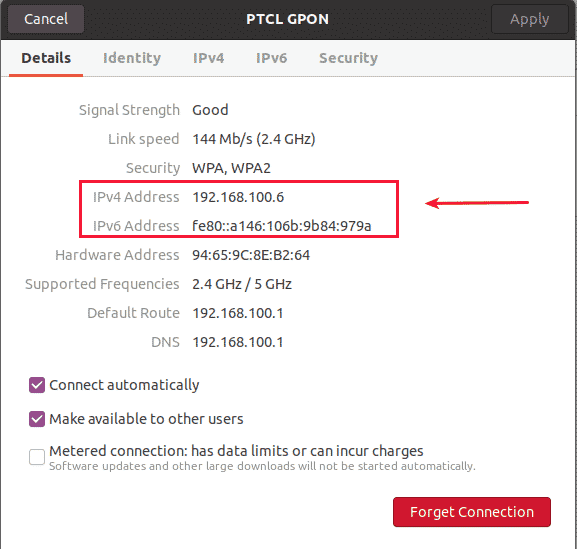
You will see the private IPV4 and IPv6 address listed here.
Method 2: Using ifconfig command
Open the terminal by pressing Ctrl+Alt+T and install net-tools using the following command.
sudo apt install net-tools
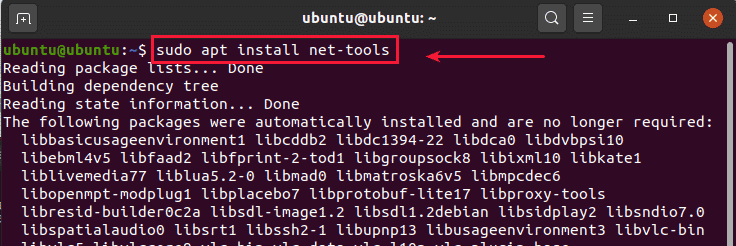
When you are done with the net-tools installation, type the following command and it will show you the IP address against your interface.
ifconfig
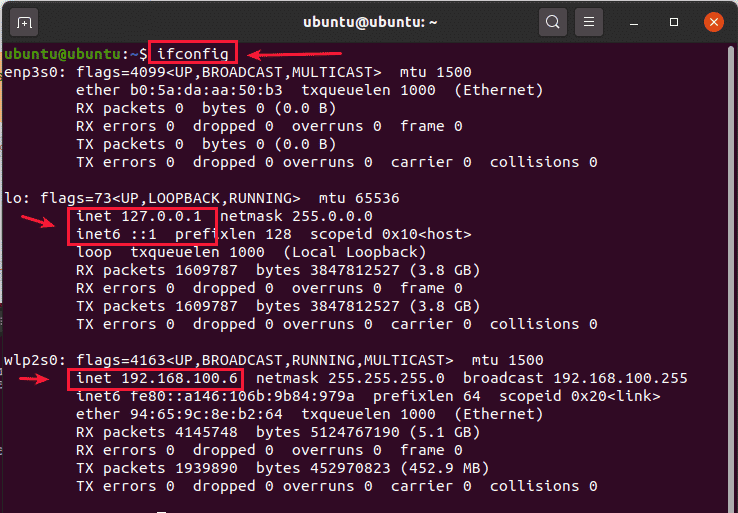
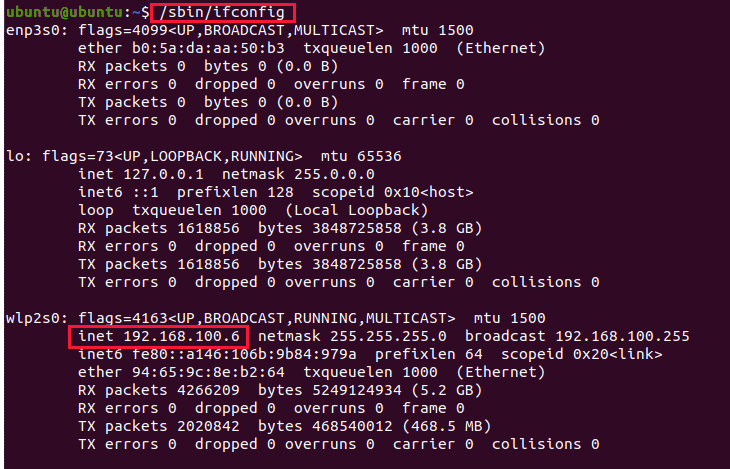
You can also execute the following command to get the same result.
/sbin/ifconfig
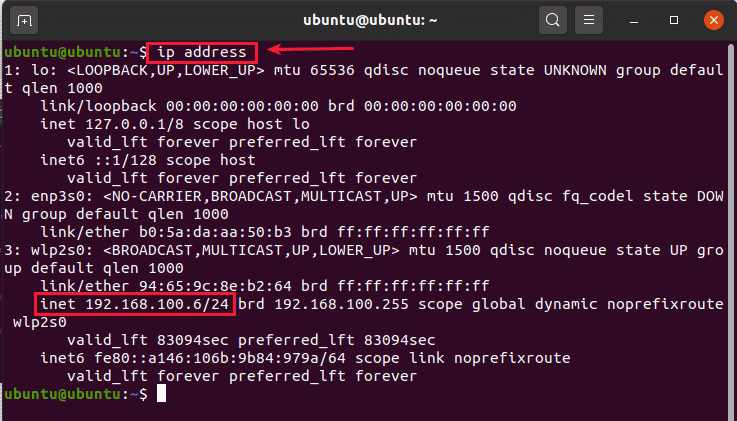
Method 3: Using ip command
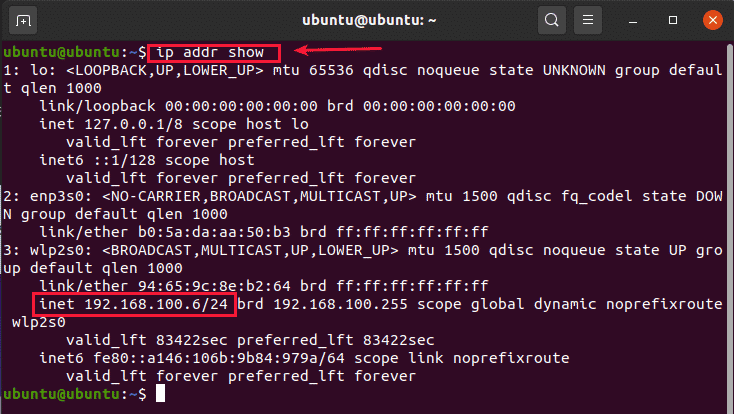
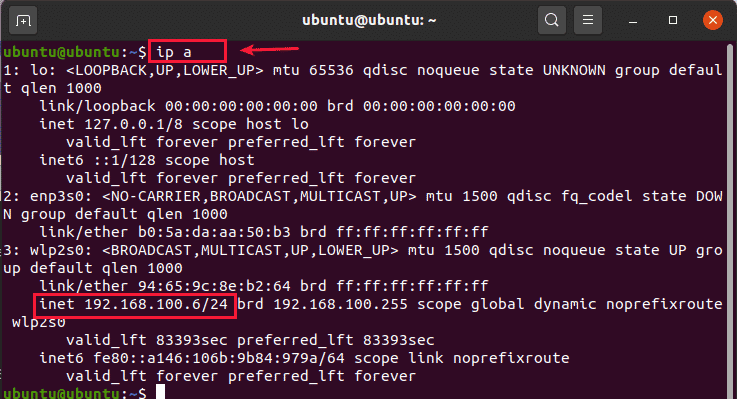
Open the terminal by pressing Ctrl+Alt+T and enter one of the following commands.
ip addr show
ip a
ip address
Method 4: Using hostname command
Open the terminal by pressing Ctrl+Alt+T and enter the following hostname command.
hostname -I

Conclusion:
In this article, you have learned how to check your private IP address in Ubuntu 20.04 LTS system. In some other post, we will show you the methods of checking public IP address assigned to your Ubuntu 20.04 LTS system. Please feel free to comment below if you have any questions or suggestions and we will get back to you.
Click here if you would like to find your public IP address in Ubuntu 20.04 LTS.


