Configuring and deploying applications on a single server is usually a simple task. However, in a complex IT environment with multiple servers, this can be a daunting and time-consuming task. Developed and maintained by RedHat, Ansible is an open-source server configuration and software provisioning tool that simplifies application deployment and configuration management. It lifts the weight off of IT operation teams and automates the configuration of servers and the deployment of applications in a simple and effective manner.
Compared to its counterparts such as chef and puppet, Ansible is the most widely used tool since it doesn’t require an agent to communicate with remote hosts. Ansible leverages the SSH protocol to communicate with remote targets, and in doing so, the CPU resources of the remote hosts remain unaffected.
Ansible Lab setup
For our test environment, we have two nodes: the control node where Ansible will be installed and the remote host that will be configured from the Ansible control node:
Ansible control node IP 192.168.2.101 Ubuntu 20.04
Remote host IP 192.168.2.104 Ubuntu 20.04
Additionally, ensure that you have a sudo user configured on the Ansible control node and that the SSH daemon is running on both nodes.
Without much further ado, let’s touch base on how to install Ansible on Ubuntu 20.04
Step 1: Install Ansible
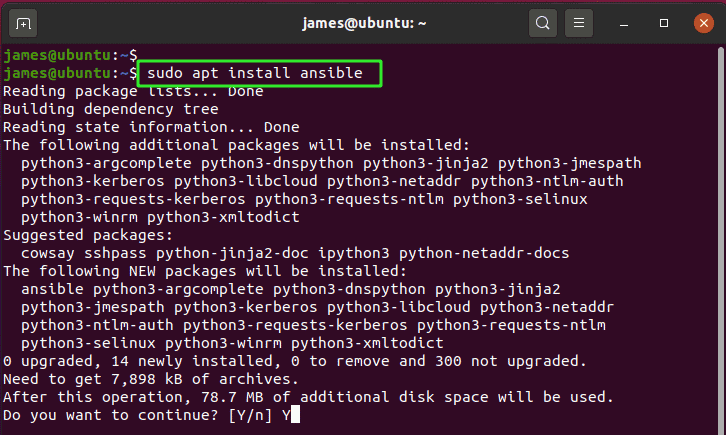
Right off the bat, log in to the Ansible master server and install Ansible as the sudo user as follows.
$ sudo apt install ansible
This installs Ansible alongside a host of Python3 packages that are essential for Ansible to run without issues.
Once installed, you can confirm the Ansible version as shown.

The output provides some extensive information. It displays the version of Ansible – in this case, Ansible 2.9.6 – the module and Ansible executable path as well as the Python version installed on your system.
The configuration file – ansible.cfg – is the Ansible configuration file located in the /etc/ansible directory. The settings determine how Ansible runs and interacts with remote clients. Additionally, the directory contains an inventory file called hosts. This is where remote or managed hosts are defined. As we plod along in this tutorial, we will define the remote host in this inventory file.
Step 2: Set up passwordless SSH login
The SSH protocol provides two methods of authentication: password and public/private key authentication. Using SSH keys, we are going to set up a passwordless ssh login method to provide a safer and more convenient way of interacting with the remote host. The passwordless SSH login method provides a seamless way of interacting with the host since we won’t be required to provide a password when running playbook files.
To set up passwordless SSH login, we are first going to generate the SSH key pair as shown:
$ ssh-keygen
Press ENTER all the way to accept the default suggestions.
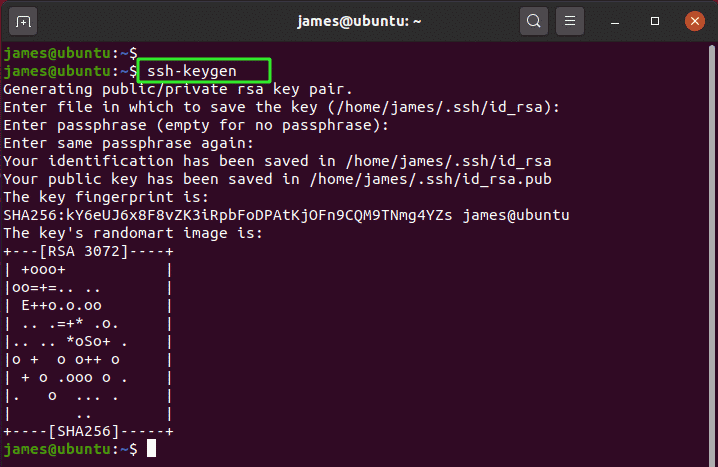
The SSH key pair includes a private and public key. We have the id_rsa which is the private key. Also, we have the id_rsa.pub which is the public key.

Next, we are going to copy the public key to the remote host using the root user as the remote host’s user.
NOTE
Before copying the ssh public key file, we will configure the remote user in the Ansible configuration file as shown.
$ sudo vim /etc/ansible/ansible.cfg
Set the remote user to root.
remote_user=root

Save the file.
Next, head over to the remote host and enable remote root login by editing the /etc/ssh/ssh_config file.
$ sudo vim /etc/ssh/ssh_config
Append the line below
PermitRootLogin yes
Once again, save and exit.
Now we can proceed and copy the SSH public key to the remote host as shown.
$ ssh-copy-id root@192.168.2.104
If you are logging in for the first time as root user, you will get the prompt as shown in the image below. Simply type ‘yes’ to continue connecting. Once you provide the remote host’s root password, the SSH key will be added to the root home directory.
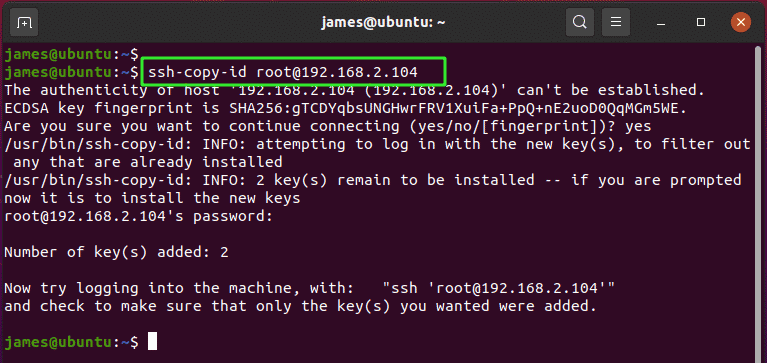
For subsequent logins, you won’t be required to provide a password. To just verify this, exit from the remote host and try logging in once more.
$ ssh root@192.168.2.104
This automatically takes you to the remote host’s shell as shown.
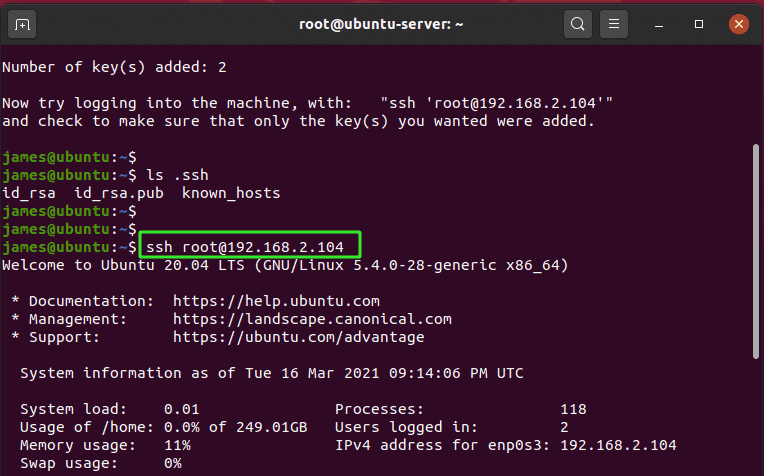
Perfect! Our passwordless SSH login setup is complete. Now we will create a playbook file that will install the Apache webserver.
Step 3: Add the remote host in the Ansible configuration file
Next up, we will define our remote host in the Ansible inventory file which, by default, is the /etc/ansible/hosts file. So, open the file.
$ sudo vim /etc/ansible/hosts
The file hosts is structured in INI format. We are going to add the IP address of our host under the webservers group name.
[webservers]
192.168.2.104
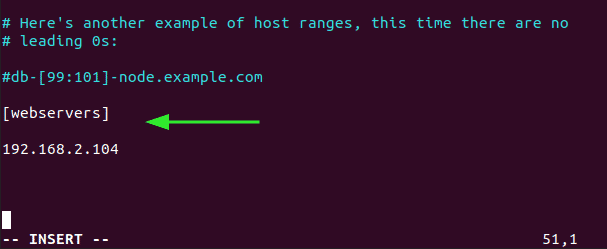
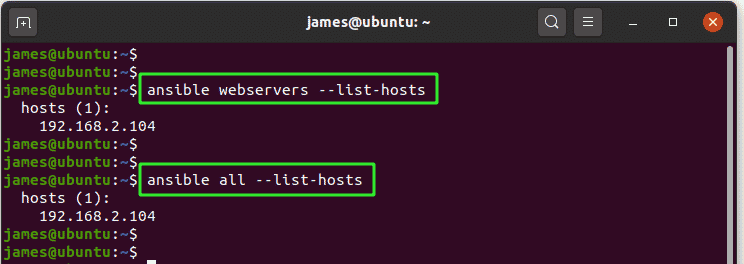
Save the inventory file and close. To verify the hosts defined in the inventory file, execute:
$ ansible webservers --list-hosts
Alternatively, to check all hosts in all the host groups, execute:
$ ansible all --list-hosts
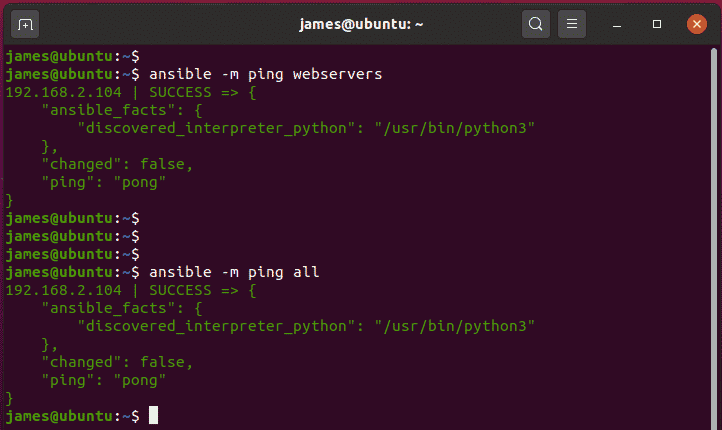
Now we are going to test for the presence of the Ansible Python module on the remote host.
$ ansible -m ping webservers
NOTE:
The ping module is not an ICMP ping command. It’s just a trivial test to check if the Python3 module is installed and the presence of SSH.
The output below shows that the command was successful. The output also displays the IP of the remote host defined under the webservers group. If you have multiple hosts defined under several groups, use the all option.
$ ansible -m ping all
Step 4: Create a playbook file to configure the remote host
With the remote host defined, we are now going to create a playbook file to install the Apache webserver. A playbook file is a YAML file in Ansible that stipulates the tasks to be carried out in the remote host.
$ sudo vim /etc/ansible/apache.yml
The playbook file is defined below. Note that the file begins with 3 hyphens ( — ). Also, take note of the indentations.
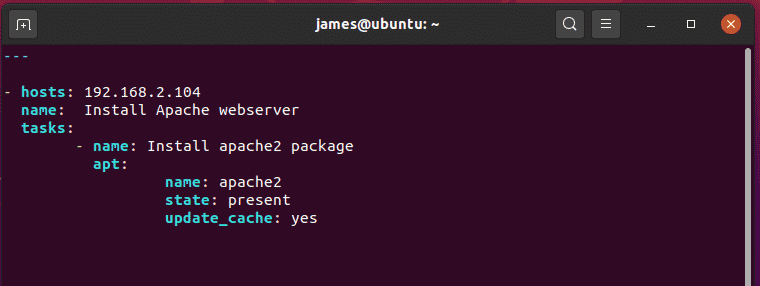
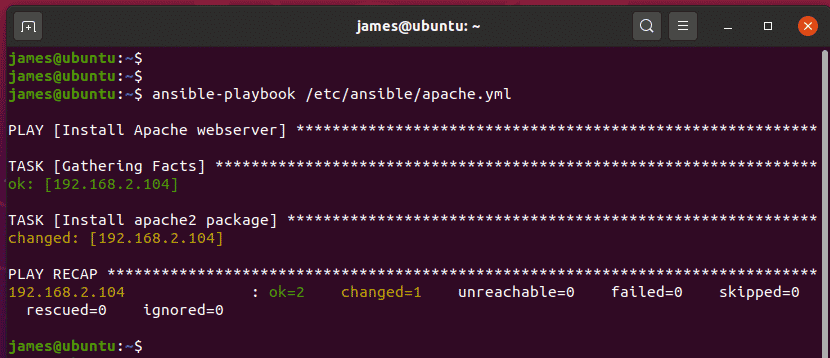
Lastly, execute the playbook file as follows.
$ ansible-playbook /etc/ansible/apache.yml
During runtime, the playbook carries out the tasks meticulously and displays every action on the terminal. It installs the Apache webserver and starts the service.
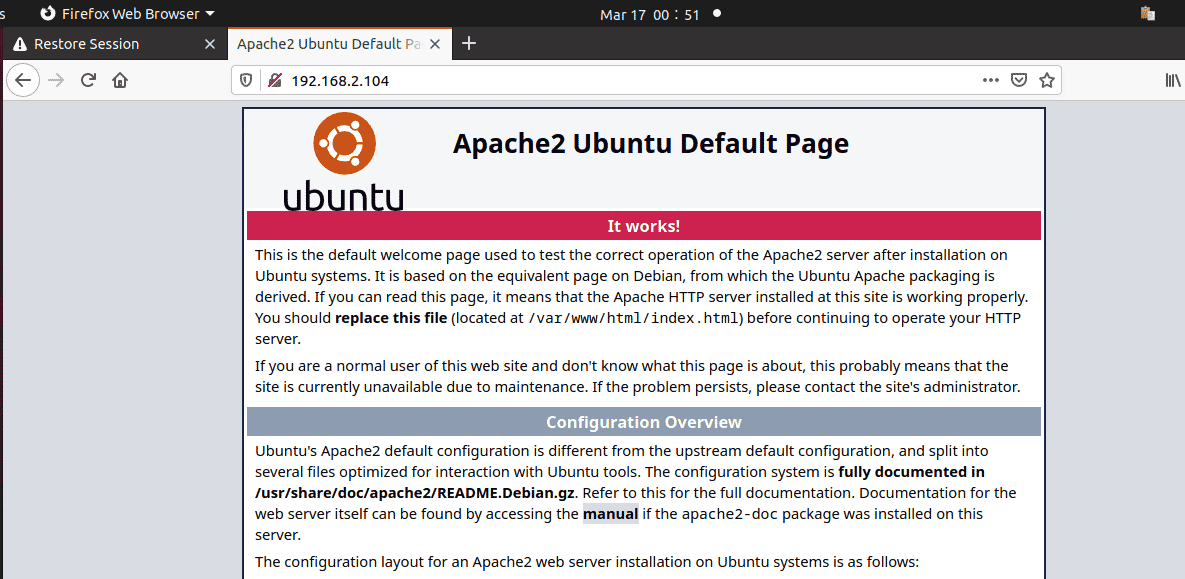
To confirm that the webserver was successfully installed, launch a browser and browse the remote host’s IP as shown:
http://server-ip/
Summary
Ansible is a widely used automation tool in DevOps and used by thousands of developers and sysadmins to configure and deploy applications on servers. It saves time and minimizes the effort required to handle a multitude of servers in a complex IT infrastructure. We do hope that you can comfortably install and configure Ansible on Ubuntu 20.04.


