Homebrew is a widely used package manager in Mac systems. Additionally, you can install Homebrew on Linux and perform package management tasks such as installing and upgrading software packages. HOmebrew cask provides support for quick installation of application such as VLC, Google Chrome and so much more.
In this guide, we
Now, let us walk you through the installation of Homebrew on Ubuntu 20.04.
Step 1: Update the system & install dependencies
Let’s hit the ground running. To start off, update the package lists.
$ sudo apt update
Once the update of the package index is complete, install the build-essential meta-package. This provides a link to several other packages that are going to be installed on your system as dependencies.
$ sudo apt install build-essential
Next, install the git version control package.
$ sudo apt install git
Great, we are all good with the dependencies, let’s now proceed and install HomeBrew.
Step 2: Download and run the Homebrew installation script
There is a prebuilt shell script that automates the installation of Homebrew. So, execute the following command to download and run the shell script.
$ /bin/bash -c "$(curl -fsSL https://raw.githubusercontent.com/Homebrew/install/HEAD/install.sh)"
The execution of the script creates a linuxbrew directory in the home directory that contains Homebrew settings, libraries, configuration files, and other crucial files.

The download and execution of the script takes a while, and therefore, some patience will do.
Step 3: Add Homebrew to your PATH
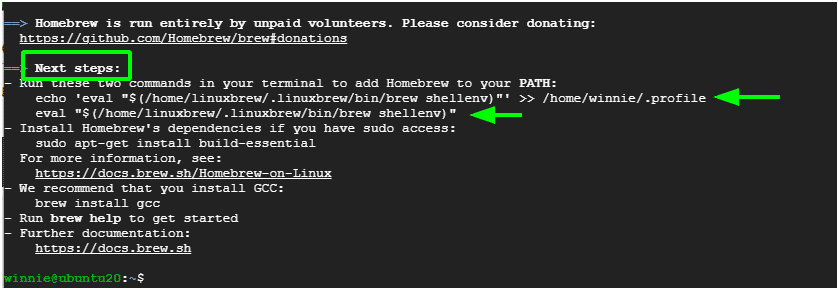
Once the command is fully executed, Some additional steps are required to add Homebrew to your PATH. Some steps will be provided for you to guide you on how to accomplish this.

So, in my case I executed the commands as indicated:
$ echo ‘eval “$(/home/linuxbrew/.linuxbrew/bin/brew shellenv)”’ >> /home/winnie/.profile
$ eval “$(/home/linuxbrew/.linuxbrew/bin/brew shellenv)”

At this juncture, Homebrew is successfully installed. You can confirm the version of Brew installed as follows.
$ brew --version

Let’s now give Homebrew a try and see if we can install some packages.
Step 4: Confirm that Homebrew works
To verify that Homebrew is working as expected, run the command:
$ brew doctor
You will get confirmation that your system is ready to use brew.

Now, you can use Homebrew to install software using the syntax:
$ brew install package-name
For example, to install Python3, run the command:
$ brew install python3

When the installation of Python3 is complete, verify the version installed as follows:
$ python3 -V

Perfect! We have managed to successfully install and configure Homebrew on Ubuntu 20.04. We trust that this guide was able to help you with the installation of Homebrew on Ubuntu 20.04


