Introduction
Lynx is the oldest text browser for the worldwide web. It is independently developed by its maintainer. It is not only speedy but also uses fewer resources of a system. Today I will show you how easy it is to install Lynx on Ubuntu 20.04 LTS machine in this guide. Lynx is available in Ubuntu repositories.
Step 1. Install Lynx
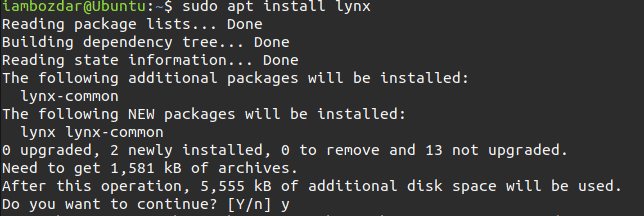
As lynx is available in Ubuntu repositories, it can be installed using standard commands. Apply the following command to start the installation process. Lynx does not have any dependencies except lynx-common, so there are no issues of dependencies problems.
$ sudo apt update
$ sudo apt install lynx

Step 2. Launch the Browser
In the previous step, we updated the repositories and installed the browser. Now the terminal is supercharged to launch the browser. Use the given launch command to launch the Lynx browser in your terminal.
$ lynx
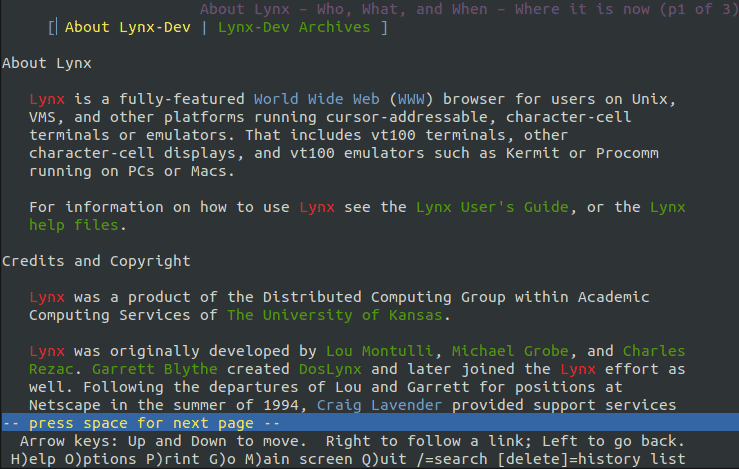
Lynx will start with its man page when we run it for the first time.

Step 3. Access The Web
Lynx is tightly bound to vim keys. It is very important that you should read out the man files first to continue. If you are not comfortable with vim then Lynx is not the terminal browser for you.
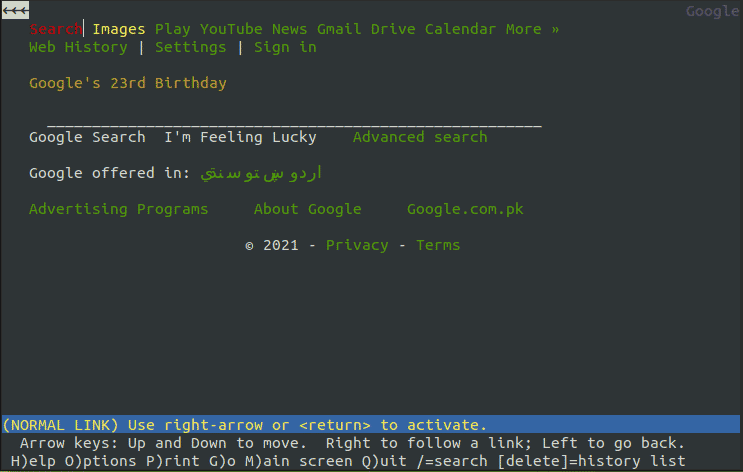
In the given screenshot, you will notice that I have accessed the Google homepage. To access any website, you will have to always press G button to begin browsing.

Step 4. Quit Lynx
Let us quit Lynx first before we move to remove it. You will need to press Q to close the browser. For clarity check the screenshot below. As soon as you hit the Q, you will be back to the terminal as normal.

Step 5. Remove Lynx
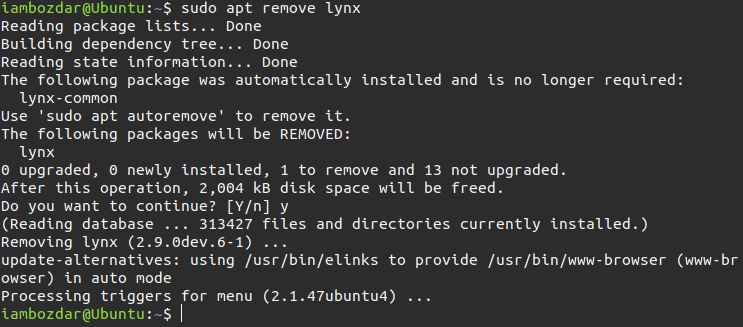
Removing Lynx is simple. We can use the standard apt command to remove it.
$ sudo apt remove lynx

Conclusion
In this guide, we learned how to install, run, and remove the oldest terminal-based browser Lynx for Ubuntu 20.04 LTS terminal. Lynx runs in the terminal and is as powerful as any other browser to perform an excellent job.


