Siege is an open-source benchmarking and load testing tool. Siege can be a valuable tool for analyzing your website’s performance and detecting bottlenecks. Its results include a variety of measures that gives you valuable information into the general health of your website. Siege can be used to evaluate website response, transaction rate, throughput, etc. It can stress test a single website or multiple websites simultaneously.
Today’s post is about how to install the Siege benchmarking tool on Ubuntu OS. We will cover:
- Installation of Siege via APT
- Installation of Siege via tar.gz archive
Note: The procedures shown here have been tested on Ubuntu 20.04 LTS.
Method # 1 Installation via APT
In the following procedure, we will install the Siege Benchmarking tool from the default Ubuntu repository using APT.
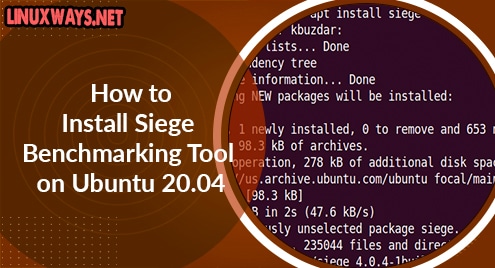
1. To install Siege on Ubuntu, first update the repository index as follows:
$ sudo apt update
Enter sudo password.
2. Now install Siege using the command below:
$ sudo apt install siege
If you are prompted with a y/n during installation, type y and hit Enter.

3. After Siege is installed, you can verify it as follows:
$ siege --version
The output below verifies that Siege version 4.0.4 has been installed.

Method #2 Installation via tar.gz
In the following procedure, we will install the Siege Benchmarking tool using the tar.gz package.
1. First install the build-essential package using the command below:
$ sudo apt install build-essential
Enter sudo password. If you are prompted with a y/n during installation, type y and hit Enter.
2. Download the latest version of Siege tar.gz from this link. You can also use the command below to download Siege Latest version 4.1.0 (as of July 2021):
$ wget http://download.joedog.org/siege/siege-latest.tar.gz
This command will save the Siege tar.gz package to your Home directory.

3. Move the downloaded package to the /opt directory using the command below:
$ sudo mv siege-latest.tar.gz /opt/
4. Now move inside the /opt directory:
$ cd /opt/
And extract the Siege archive file:
$ sudo tar -zxf siege-latest.tar.gz
It will be extracted to a directory named siege-version-number (e.g. siege-4.1.0).
5. Move inside the Siege extracted directory:
$ cd siege-4.1.0/
You can use the ls command to view the contents of this directory.
6. Now run the below command to run the configure script in the Siege directory:
$ sudo ./configure
This command will check for all the dependencies that are required to build and install the package.

7. Now build the package as follows:
$ sudo make

8. Then install the package using the command below:
$ sudo make install

Now Siege is installed. You can verify it as follows:
$ siege --version
The output below verifies that Siege version 4.1.0 has been installed.

Load Testing Using Siege
To load test any website using Siege benchmarking tool, use the following syntax:
$ siege options <URL>
You will see results of the test like this:

Let’s have a quick understanding of results:
- Transactions refers to total number of server hits
- Availability is the percentage of connections successfully responded by the server
- Elapsed time refers to how long the test ran.
- Data transferred is the total amount of data Siege used for site testing
- Response time is the time took by server for responding the requests
- Transaction rate refers to the average number of transactions per second a server can manage
- Throughput refers to the number of requests server can serve per second
- Concurrency is the number of open parallel connections
- Successful & Failed transactions are the number of times the server responded with status code less and greater than 400 respectively.
- Longest transaction & Shortest transaction are the times that the longest and shortest transaction took to complete out of all transactions respectively
Siege has various command-line options which you can view using the command below:
$ siege --help
Uninstall Siege
If you need to remove Siege from your system, you can do so using the methods below:
To remove Siege that was installed using the apt tool, use the command below:
$ sudo apt remove siege
To remove Siege that was installed using the tar.gz package, use the commands below:
Navigate to Siege directory:
$ cd siege-4.1.0/
Then uninstall it:
$ sudo make uninstall
In this post, we covered how to install Siege benchmarking tool on Ubuntu OS using two methods: using the APT and the tar.gz package. We also went through how to uninstall Siege in case you need to remove it.

Karim Buzdar holds a degree in telecommunication engineering and holds several sysadmin certifications including CCNA RS, SCP, and ACE. As an IT engineer and technical author, he writes for various websites.


