Introduction:
Font customization is generally a very prime feature of all the text editors. However, the users also want to have customization options available for the browsers that they use. Along with all the other customization options, the Google Chrome browser also gives you the liberty to customize its fonts according to your choice and this guide will teach you how you can achieve this objective.
Method of Customizing the Fonts in Google Chrome:
For customizing the Google Chrome fonts according to your choice, you have to proceed as stated below:
Step # 1: Head on to the Appearance Settings of Google Chrome:
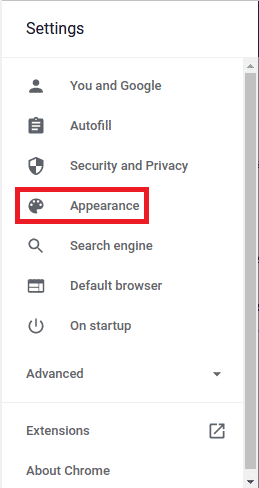
First, you need to select the Appearance tab from the Settings page of Google Chrome for accessing its appearance settings.

Step # 2: Move to the Font Customization Settings of Google Chrome:
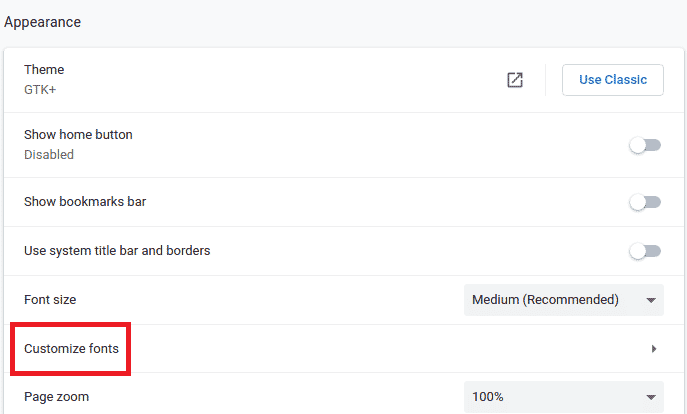
Then, you need to scroll down and click on the Customize fonts option as shown in the image that follows:

Step # 3: Customize the Google Chrome Fonts according to your Choice:
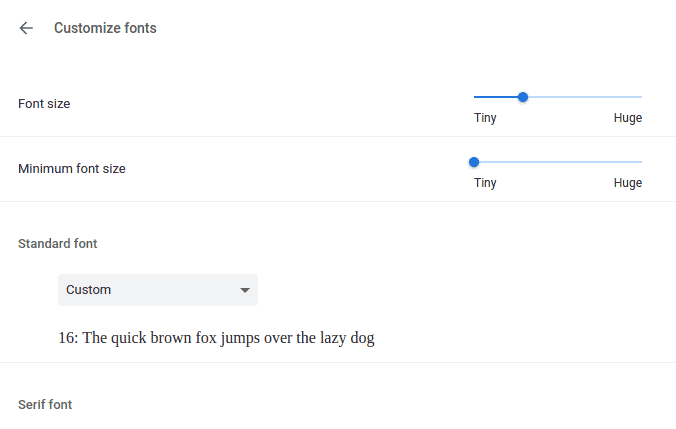
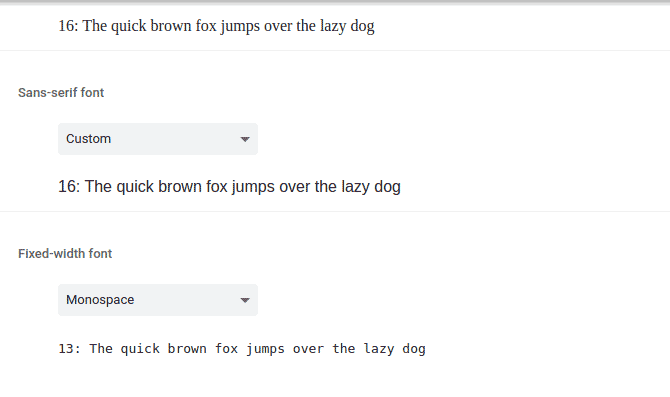
When you will do this, you will be presented with lots of different font customization options from where you can adjust these fonts right according to your needs. These options are shown in the images below:


You can adjust the size of your fonts, choose a different font style, change the font spacing, etc. with the help of these font customization settings of Google Chrome. Moreover, whenever you will select a new font customization option other than the default one, you will also be presented with a live preview of what your new font will look like so that you can further adjust it accordingly.
Conclusion:
By performing the steps explained above, you can conveniently customize the fonts of your Google Chrome browser according to your choice. In this way, you can make your Google Chrome browser look just the way you like.


