SSH is a widely used protocol used mostly by system administrators to securely login to remote servers. It allows them the command-line access to work on the remote system as if they are sitting right at the server. In this post, we will describe how you can enable SSH on the CentOS system and connect to it using an SSH client. We will also describe how to configure the SSH server.
For Ubuntu OS, visit this post for how to enable SSH on Ubuntu.
Note: We have demonstrated the procedure on CentOS 8 machine.
Step 1: Installing OpenSSH Server
First, you will have to install an OpenSSH server on the machine you want to remotely access via SSH. Use the command below to install the OpenSSH server on your CentOS machine:
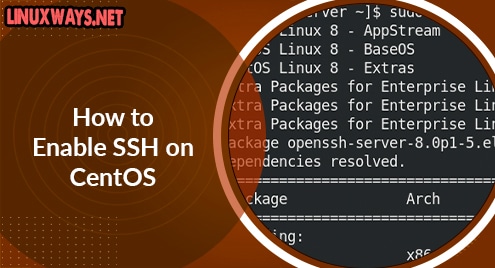
$ sudo dnf install openssh-server
Enter sudo password and then you will see the installation started. Press y if prompted for confirmation.

This should install the OpenSSH server on your system.
Step 2: Start SSH Daemon and Verify Status
Now that SSH has been installed, you can start its service. Use the command below to start SSH daemon:
$ sudo systemctl start ssh
Then to verify if the SSH daemon has started, use the command below:
$ sudo systemctl status sshd

Step 3: Allow SSH through Firewall
If the firewall is enabled on your CentOS system, it will block the incoming SSH traffic. To permit incoming SSH traffic, you will need to add a rule in the firewall. The default port used by SSH is 22. So the rule should open port 22.
Use the command below to allow incoming SSH traffic on port 22:
$ sudo firewall-cmd --permanent --add-port=22/tcp
This command will add a rule in your firewall that will allow traffic on port 22. If you have configured SSH for a port other than 22, make sure to use that port in the firewall rule.
Step 4: Test SSH access
To test if SSH is working and you can connect to it, open your client machine. This machine should have an SSH client. If you are using a CentOS client, you can install SSH client as follows:
$ sudo dnf install openssh-clients
Here we are going to test it using our Ubuntu client machine.
To connect to an SSH server, you will require an IP address and a username of the remote system:
$ ssh remote_username@remote_ip_address
For instance, in our case, the IP address of the remote machine (where the SSH server is installed) was “192.168.72.192” and the username was “kbuzdar”, so we ran the command:
$ ssh kbuzdar@192.168.72.192
Note: If you don’t know how to find the IP address of a machine, visit this post.
After you have connected to the SSH server, it will ask you to enter the password. Enter the password and then you will be login to your remote system. Now you will also notice the Terminal prompt has been changed to reflect the remote system username and system name.

Configuring SSH
The SSH configuration file is located at /etc/ssh/sshd_config. This file contains different configuration options which you can change according to your needs. Here we will look at few common options that might need modifications e.g. changing the default SSH port and the listening address, disabling root login, configuring max sessions and password tries, etc.
To configure or change any option, you will need to edit the sshd_config file:
$ sudo nano /etc/ssh/sshd_config
Remember, after changing any settings in the sshd_config file, make sure to reload the SSH server to implement the changes:
$ sudo systemctl reload ssh
Changing SSH Port
The SSH by default uses port 22 for listening to incoming connections. If for any reason you want to change the SSH port, you can do so by editing the sshd_config file and searching for a line that says:
# Port 22
Uncomment the line by removing the hash (#) and the replace 22 with the port number you want to set for SSH.

Once done, save and close the sshd_config file.
Changing Listening Address
By default, SSH listens on all local interfaces. To configure SSH to listen on only a specific network interface, edit the sshd_config file:
$ sudo nano /etc/ssh/sshd_config
Search for the line that says:
#ListenAddress 0.0.0.0
Uncomment the above line and replace 0.0.0.0 with the local address on which you want SSH to listen on.

Once done, save and close the sshd_config file.
Disable Root Login
By default, the root user is allowed to log in using SSH. This is controlled by the PermitRootLogin parameter in the sshd_config file which is by default “yes” which means root login is allowed.
To disable root login, edit the sshd_config file:
$ sudo nano /etc/ssh/sshd_config
Look for the line that says:
# PermitRootLogin no
Uncomment (if commented) the above line and replace “no” by “yes” to disable root login using SSH.

Once done, save and close the sshd_config file.
Change Number of Allowed Sessions and Authentication Attempts
By default, the maximum number of sessions allowed per network connection is 10. It can be changed by the MaxSessions parameter in the sshd_config file. Similarly, the maximum number of authentication attempts for one login session is 6 which can be changed using the MaxAuthTries parameter.
To change the number of sessions allowed per network connection, search for the line that says:
# MaxSessions 10
Uncomment the above line and replace its value with your desired value.
To change the number of authentication attempts allowed per login session, search for the line that says:
# MaxAuthTries 6
Uncomment the above line and replace its value with your desired value.

Once done, save and close the sshd_config file.
Change Grace Time
When you connect to the SSH server, it gives you 120 seconds (default time) to complete your authentication using a username and password. If you do not login during this time, the server drops the connection and you have to login again. You can set this time a little higher than it takes you to complete login or set it lower to prevent DoS attacks where multiple sessions are kept open for a long time.
To change this time, search for the line that says:
# LoginGraceTime 120
Uncomment the above line and replace its value with your desired time (in seconds). If you do not want to set any time limit, set it value to 0. 
Once done, save and close the sshd_config file.
In this post, we covered how to enable SSH on a CentOS machine and connect to it using a client machine. We also looked at various configuration options for the SSH server. If you want to make your remote access secure, visit our post on 11 Best Ways to Secure Your SSH Server.

Karim Buzdar holds a degree in telecommunication engineering and holds several sysadmin certifications including CCNA RS, SCP, and ACE. As an IT engineer and technical author, he writes for various websites.


