Skype is the most commonly used application in the world that is used basically for communication between people. Skype offers free online audio and video call services worldwide. You can also contact your friends on landline with affordable charges via skype. The more useful skype features are instant messaging, voice mail, call forwarding, sending files and images, etc.
In this article, we will talk about the installation of Skype on the CentOS 8 system. We have implemented all steps on the CentOS 8 command-line application. You can also install Skype on your LinuxMint 20 and Ubuntu 20.04 system using the highlighted links.
Prerequisites
All commands should be executed under the sudo or root privileges.
Installation of Skype on CentOS 8
Skype can install on your CentOS system by using the following methods:
- By adding Skype rpm repository
- Install Skype through the snap tool
Skype is not available as an open-source application and it is also not included in the default Yum repository of CentOS 8. So, you can’t install Skype from there.
Method 1: By adding Skype RPM repository
You can install Skype from the Skype RPM repository. For this purpose, you need to perform the following steps on your CentOS machine:
Step 1: Add RPM Skype repository
Open the terminal window from the left sidebar of your desktop and login from your root account by running the ‘su’ command on the terminal as follows:

Now, Add the skype RPM repository by using the following command and enable it:
# dnf config-manager --add-repo https://repo.skype.com/rpm/stable/skype-stable.repo
The following output shows you that a repository is added to your system.

Step 2: Install Skype RPM Package
Once the repository is added and enabled, enter the following command to install the rpm skype package:
# dnf install skype for linux
The confirmation prompt for Skype installation will appear on the screen during the installation. Enter ‘y’ from your keyboard in order to confirm the installation and press ‘Enter’.
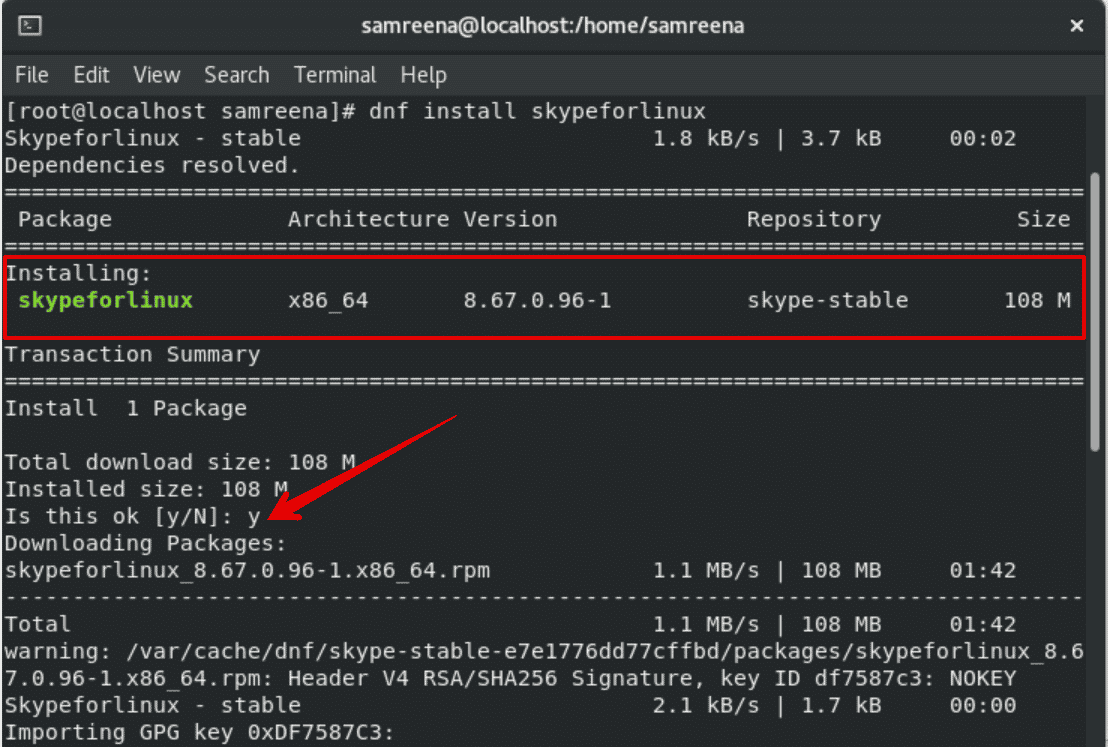
The above method for the Skype installation process is completed. Skype is installed on your system and you can use it.
Launch Skype
You can start Skype by using the application search bar. Enter the ‘Skype’ in the search bar that appears on the top of your desktop. The following search results display on your system. Click on the Skype application icon and launch it.

When you start first-time skype on your system, the following skype interface shows on your desktop:

Remove Skype
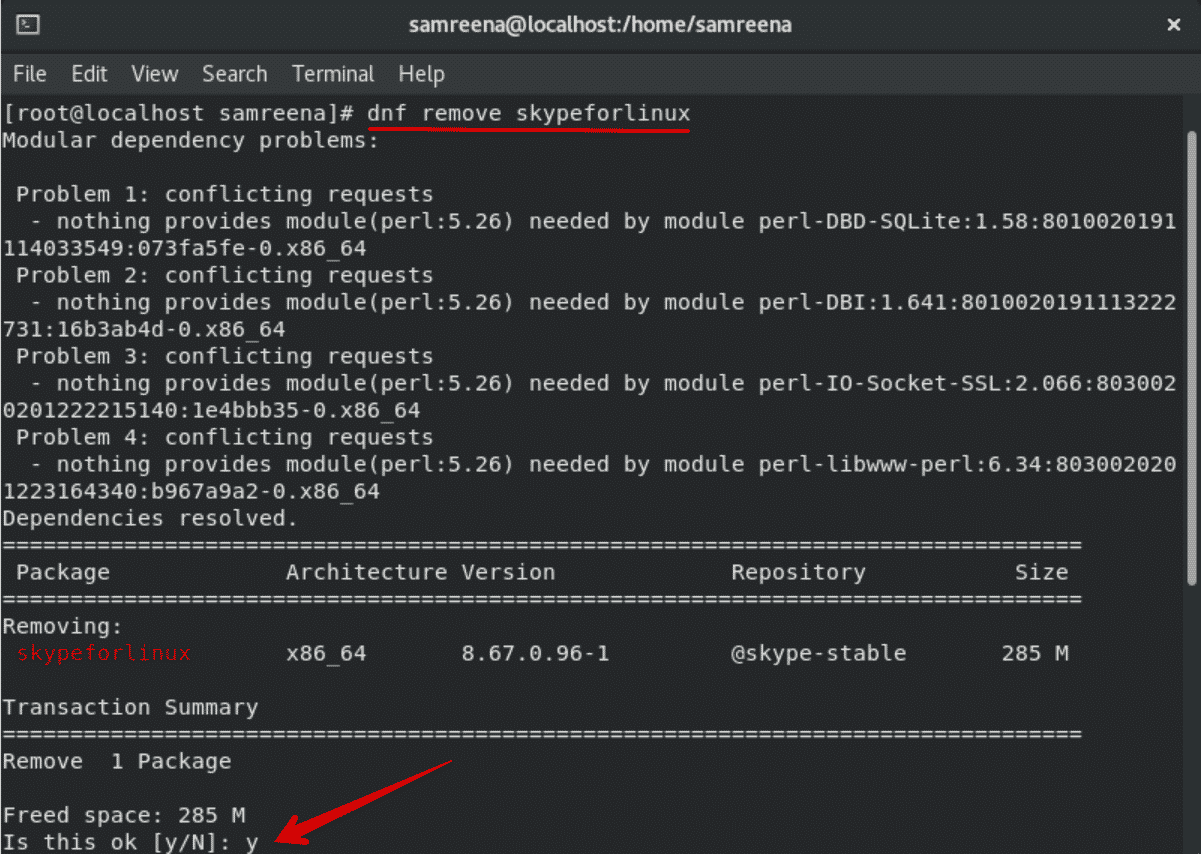
When you feel you don’t need skype for further use then, by using the following command you can remove it from your system:
# dnf remove skypeforlinux
Method 2: Install Skype through the snap tool
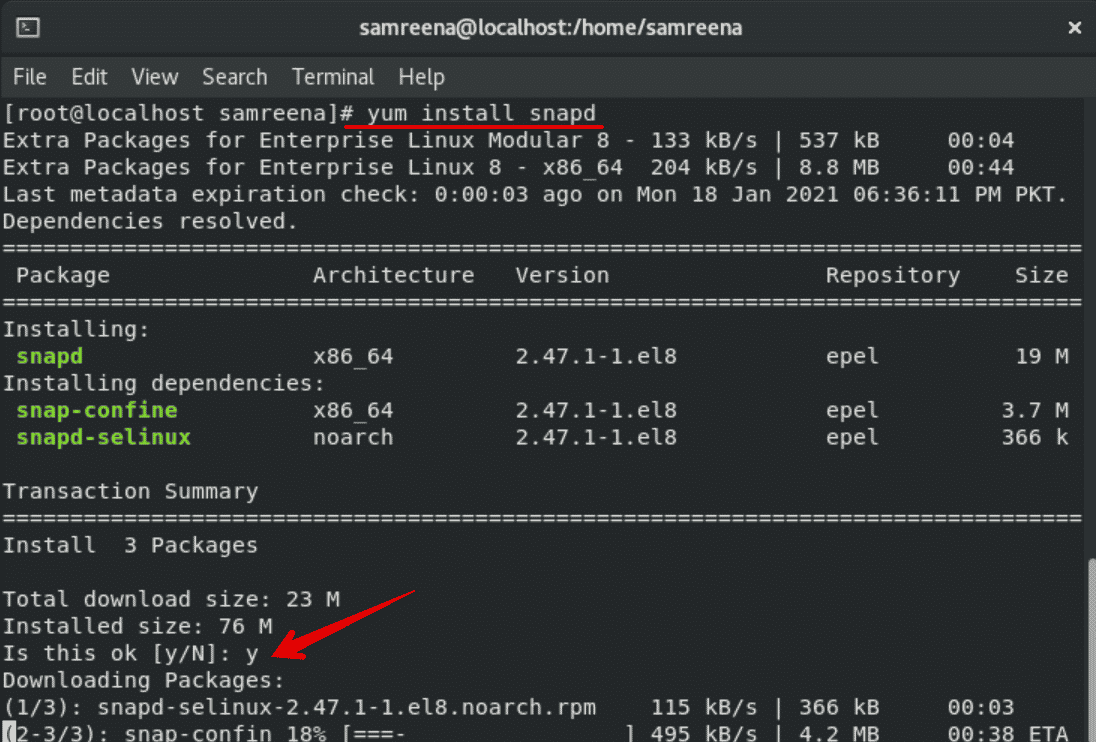
You can also install Skype using the snap tool. It comes with a bundle of software applications along with all dependencies that are needed to run the desired software application. Run the below command to install the Snapd package on your system:
# dnf install snapd
To install Skype through the snap tool, execute the following command on the terminal:
# snap install skype --classic

Remove skype using Snap tool
You can also remove skype using the snap tool as follows:
# snap remove skype

Conclusion
We have implemented how to install skype on the CentOS 8 system in this article. We have explained two different methods for skype installation. One is using the RPM skype repository and another one is through the snap tool. Now, according to your requirements, you can choose one method from both.
