Introduction
Backing up data is among the most crucial duties for a system administrator who is in charge of managing servers. So, you must be knowledgeable in backup programs to make your work easier. One of the most vital backup tools is duplicity. Duplicity is a command-line backup application that allows you to backup directories by creating encryption and password-protected tar-format versions of the volumes that you can post to a distant or local file server.
In this tutorial, we will be teaching you the installation of duplicity on the Ubuntu 20.04 system.
Install Duplicity on Ubuntu 20.04
Initially, you will need to upgrade your package to the most recent version before you proceed. With the following instructions, you can update the packages:
$ sudo apt-get update -y

We have used the “sudo” keyword in the command, so you need to enter the password of the logged-in user to proceed further. Now after updating the packages, you are ready to install duplicity on your system. So, execute the below-listed command in the terminal.
$ sudo apt install duplicity

As soon as the installation is completed, you can easily check its version by executing the following command in the terminal.
$ duplicity --version
![]()
In the output of this command, you can see the version of duplicity that is installed on your system.
Configure SSH Authentication without a Password
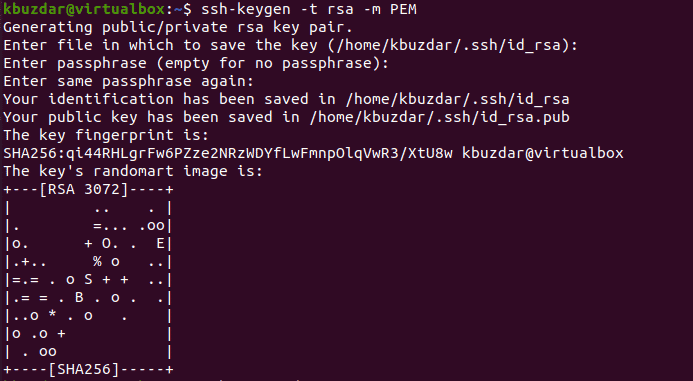
The next step is to create an RSA 2048 bit protected SSH key that you may use to securely authenticate with the remote machine without requiring to provide a password. To begin, use the following cited command to generate an RSA key:
$ ssh-keygen -t rsa -m PEM
Next, use the following cited command to copy the created RSA key to a remote backup server:
$ ssh-copy-id root@104.245.32.194
![]()
Create GPG keys
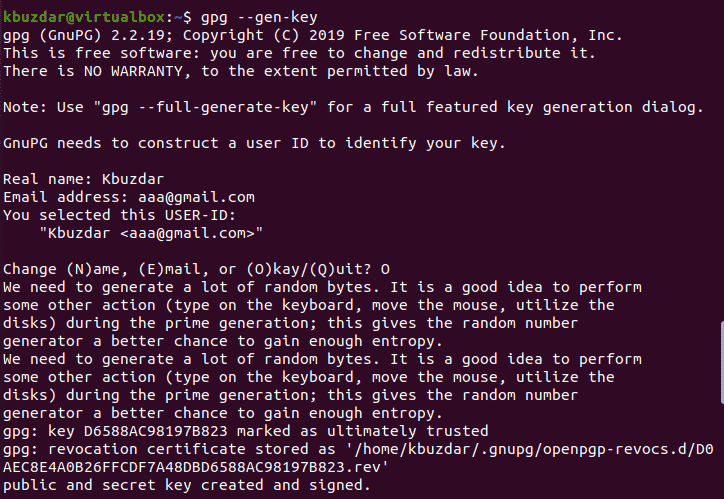
Then, before we upload the data to the remote backup server, you’ll need to produce GPG keys to secure it. GPG keys are used to add an extra layer of protection and encryption to data being sent between servers. On the Duplicity server, run the following cited command to generate a GPG key:
$ gpg --gen-key
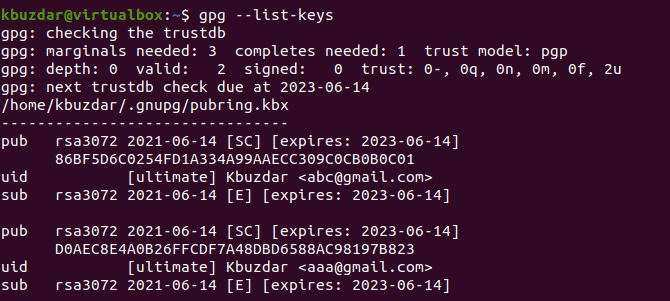
If you forgot the track of your GPG key, use the following cited command to retrieve it:
$ gpg --list-keys
Generate backup directory
After that, you’ll need to establish a backup directory on the backup server. Run the following cited command to build a backup directory:
$ mkdir –p /kbuzdar/duplicity
![]()
Launch the backup tool
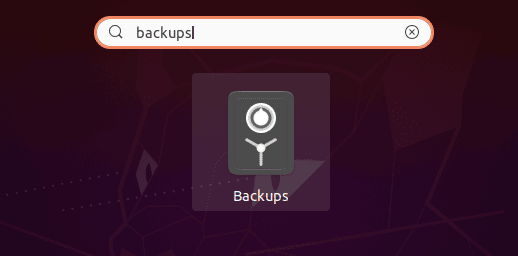
The Ubuntu application interface search bar can be used to look for keyword backups. Then, from the list of search results, select the Backups application.
The following window will appear when the application is launched. It will allow you to see the application’s current state. Click the [+] button, as seen in the following example, to add specific files and directories for backup.
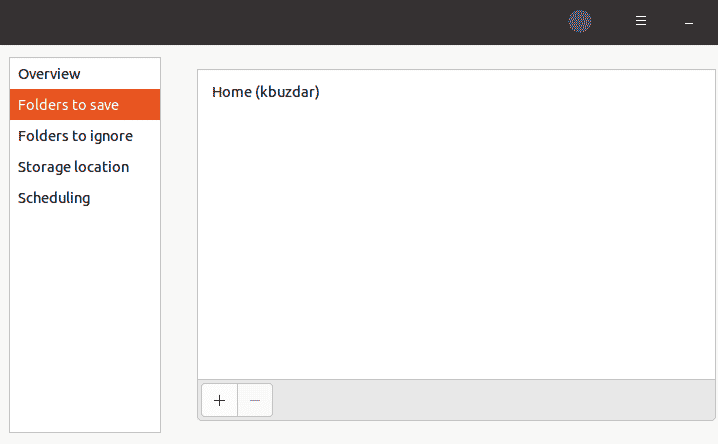
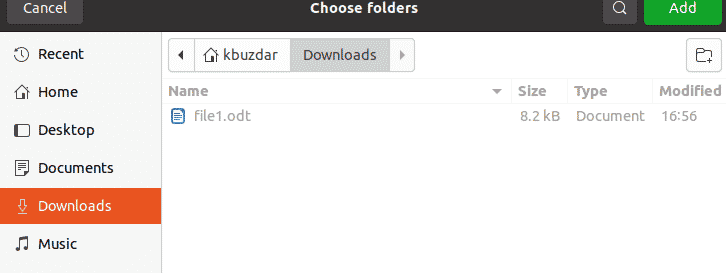
It will bring up a new window. You can go to the folders you want to back up from that screen. Tap the Add button after you’ve selected the appropriate folder.
You’ll see them displayed in the Folders to save menu once you’ve added them.
Eliminate folders that will not be backed up
Suppose, you’ve chosen to back up a whole directory, which includes some folders that you don’t want to back up since they contain unimportant information. It is possible to exclude them. From the left sidebar, select the Folders.

Choose Backup location
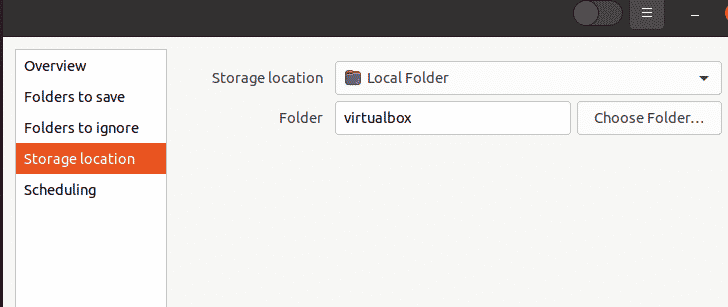
After you’ve carefully chosen the data to back up, click Storage location to select a storage place for the backup. Select the Storage location tab in the left pane. On the right pane, you’ll see an option to select a storage place. You can save to a local folder, a network server, or the Next cloud service. Once you’ve chosen this option, select a folder on the above-mentioned location.
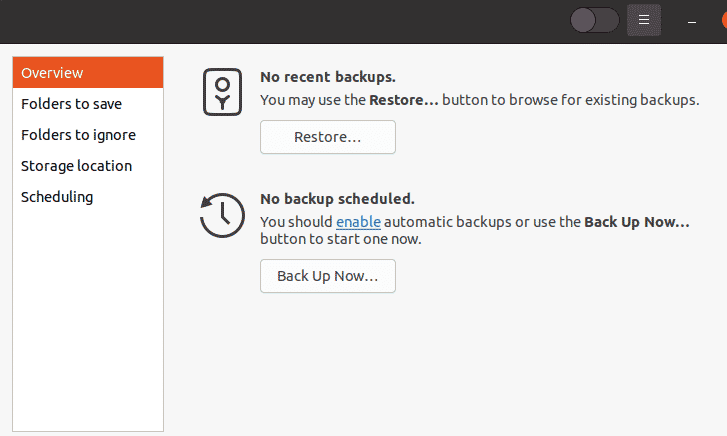
Choose the Overview tab once you’ve completed the backup configuration. Then select the Back up now option to begin the backup process.
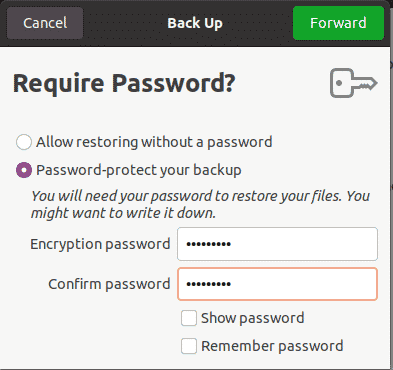
Encryption will be requested on a screen. If you want to password shield your files, type a password and then tap on “Forward”. If you pick this option, the password will be compulsory whenever you try to restore your data. Conversely, if you select Allow restoring without a password, you can skip this option.
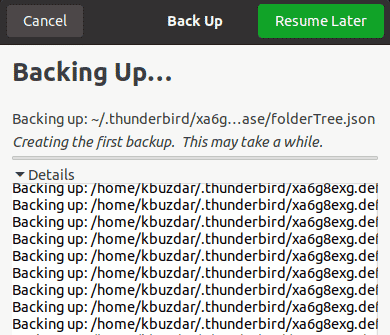
The backup will now begin, and the progress meter will show you how far it has progressed.
Conclusion
In this article, we have explained to you the process to install duplicity on Ubuntu 20.04 and how to use it. Now I believe, you will easily complete the installation by following the method described above.


