OwnCloud is an open-source application that lets users sync and shares their files from anywhere, and from any device. It lets users take control of their data by not relying on third-party data hosting services. Similar to other online cloud storage services, OwnCloud also allows you to sync your files via web browser, desktop and mobile app. OwnCloud desktop client is available for, Mac, Windows, and Linux systems and the mobile app is available for Android and iOS devices.
In today’s post, we will install OwnCloud on Ubuntu 20.04 LTS.
Step 1: Installing Prerequisites
First, we will install some prerequisites which include LAMP stack packages and some additional PHP libraries. Use the commands below for the installation of these packages:
To install Apache server, use the command below:
$ sudo apt install apache2
Then install MariaDB server:
$ sudo apt install mariadb-server
Then install PHP and some other prerequisites:
$ sudo apt install wget coreutils libapache2-mod-php php-imagick php-common php-zip php-curl php-gd php-imap php-intl php-json php-mysql php-redis redis-server php-mbstring php-ssh2 php-xml php-apcu
Enter sudo password. If it prompts with y/n, press y and then Enter key.
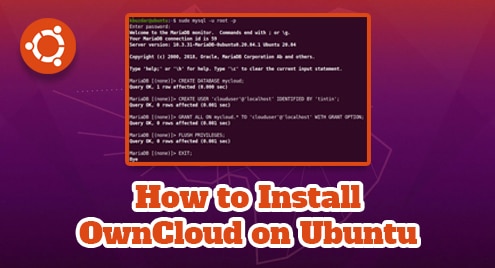
Step 2: Configuring Database
In this step, we will first secure MariaDB installation and then we will configure the database and a user for OwnCloud.
To enhance the security of the MariaDB database, we will need to run the mysql_secure_installation shell script:
$ sudo mysql_secure_installation
After running the above command, you will be asked for the current root password, press Enter. Then set a password for the root account by hitting the y key and entering the new password twice.

For all the next questions, hit the y key.

Login to MySQL using the command below:
$ sudo mysql -u root -p
Now we will create the database and a user for OwnCloud and assign this user the necessary permissions. Other than the database and user name used here, you can use different names.
Then to create a database named mycloud, use the command below:
$ CREATE DATABASE mycloud;
Then create a user named clouduser with password tintin.
$ CREATE USER 'clouduser'@'localhost' IDENTIFIED BY ‘tintin’;
Then grant the database user clouduser permissions on the database mycloud:
$ GRANT ALL ON mycloud.* TO 'clouduser'@'localhost' WITH GRANT OPTION;
Then apply the changes and exit the MySQL shell using the commands below:
$ FLUSH PRIVILEGES;

$ EXIT;

Step 3: Installing OwnCloud
Now we will download the OwnCloud server zip package from its official website. Or you can use the command below for downloading the OwnCloud server latest version (as of July 21, 2021).
$ wget https://download.owncloud.org/community/owncloud-complete-20210721.zip

Now extract the downloaded zip file in to /var/www directory.
$ sudo unzip owncloud-complete-20210721.zip -d /var/www/
The zip file contents will be extracted to /var/www/owncloud directory.
Change the ownership of the /var/www/owncloud/.
$ sudo chown -R www-data:www-data /var/www/owncloud/
Also, modify the permissions on the /var/www/owncloud directory.
$ sudo chmod -R 755 /var/www/owncloud/
Step 4: Configuring Apache
In this step, we will configure Apache by creating a virtual host configuration file for OwnCloud. Create the virtual host configuration file as follows:
$ sudo nano /etc/apache2/conf-available/owncloud.conf
Then add the below configuration lines in the file:
<Directory /var/www/owncloud/>
Alias /owncloud "/var/www/owncloud/"

<Directory /var/www/owncloud/>

Options +FollowSymlinks

AllowOverride All

<IfModule mod_dav.c>

Dav off

</IfModule>

SetEnv HOME /var/www/owncloud

SetEnv HTTP_HOME /var/www/owncloud

</Directory>
Then save and close the owncloud.conf file.
Now enable the virtual host configuration file using the command below:
$ sudo a2ensite owncloud.conf
Reload Apache configurations using the command below:
$ sudo systemctl reload apache2
Now the installation of OwnCloud has been completed, you can access OwnCloud through your web browser.
Step 5: Configuring OwnCloud
To access OwnCloud, open the address below in your web browser:
Replace ip-address in above URL with your system’s IP address where OwnCloud server is installed.
After accessing the above address, you will see the below OwnCloud page asking you to create an admin account. Type any username and password for your new admin account.

Now scroll down to Storage & database section. Under the Data folder, you will see the OwnCloud default data directory. Leave this default location as it is.
Under Configure the database section, provide database username, database password, and the database name we configured in the previous (Step 2: Configuring Database) section. Leave the database host field as localhost. Then click Finish setup. 
Now you can sign in to your OwnCloud account using the admin credentials you have created in the previous step.

Once you are logged in, you will see the OwnCloud main interface. Here, you can upload files to your cloud and share with others.

That is all there is to it! In today’s post, we installed OwnCloud on Ubuntu OS. Now you can start using your on-premises OwnCloud server. For more information about OwnCloud, visit its official documentation.

Karim Buzdar holds a degree in telecommunication engineering and holds several sysadmin certifications including CCNA RS, SCP, and ACE. As an IT engineer and technical author, he writes for various websites.


