Introduction:
Steam is considered as the biggest gaming platform designed for Linux. By having it installed on your system, you can conveniently play games on Linux just like you can do it with the Windows operating system. In this guide, we will show you the process of installing Steam on a Linux Mint system.
Version of Linux Mint Used:
We have used Linux Mint 20.3 for demonstrating the installation procedure of Steam.
Process of Installing Steam on Linux Mint:
For installing Steam on Linux Mint 20.3, we performed the following steps:
Step # 1: Execute the Update Command:
First, we executed the “update” command for preparing our system for Steam installation which is as follows:
$ sudo apt update
![]()
Step # 2: Install Steam on Linux Mint:
After executing the above-mentioned command, we installed Steam on our system by running the command shared below:
$ sudo apt-get install steam
![]()
Step # 3: Launch Steam on Linux Mint:
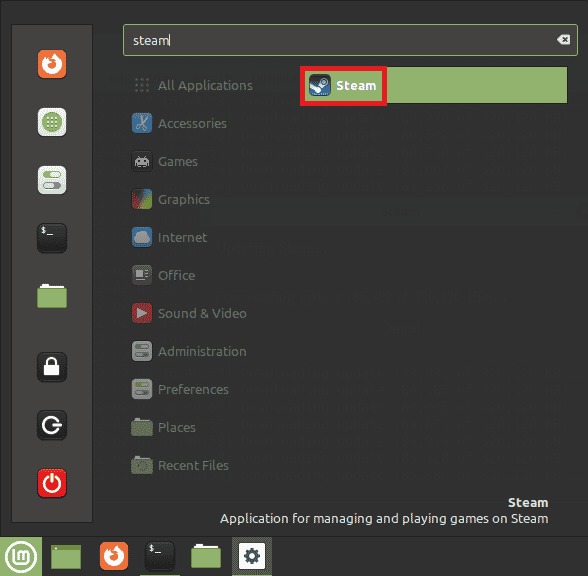
Once Steam was installed on our Linux Mint 20.3 system, we searched for it in the Mint Menu and clicked on the result highlighted in the following image:

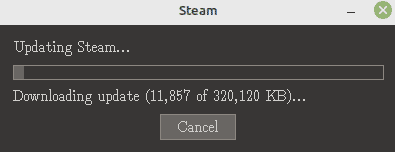
When you will do this, the additional packages for Steam will start downloading on your system:

Once these packages will be downloaded, the Steam runtime environment will be updated after which you will easily be able to access Steam on your system.

How to Uninstall Steam from Linux Mint?
We can simply run the following command for uninstalling Steam from our Linux Mint 20.3 system:
$ sudo apt-get purge --autoremove steam
![]()
Conclusion:
By following the procedure explained above, the Steam gaming platform can easily be installed on Linux Mint 20.3. Once this platform will be installed on your system, you will be able to play thousands of games on the go.
However, if you would like to install Steam on Ubuntu 20.04, follow this guide.


