In the course of writing Ansible playbook files, you may have noticed that you could reuse some of the code defined in your existing playbooks. For example, you could re-purpose the code for installing the MariaDB database server on one managed host with different hostnames, users, and passwords for another remote host. This saves a lot of time and energy which would have been used in writing new playbook files from scratch. And this is where the concept of Ansible roles comes in.
An ansible role is a concept of repurposing tasks into individual files which are easier to manage and manipulate. Each role provides a set of tasks, variables, and handlers – to mention a few – that are required for its implementation. Roles allow users to reorganize long and complex playbook structures into simpler, shorter, and neater playbook files. As we mentioned earlier, roles are meant to be reusable, and invoking roles in the playbook file simplifies code & eliminates duplication. Repetitive tasks such as installation, & configuration of applications can be packaged in separate files and reused across various managed hosts.
In this guide, you will learn how to create and use Ansible roles in playbooks. For demonstration, we will create a role that installs the Apache web server and configures the firewall to open port 80.
How to create an Ansible role
We will begin by creating a simple Ansible role. To create a role, simply use the command syntax below where myrole is the name of the role.
$ ansible-galaxy init myrole
For example, to create a role called test_role invoke the command.
$ ansible-galaxy init test-role

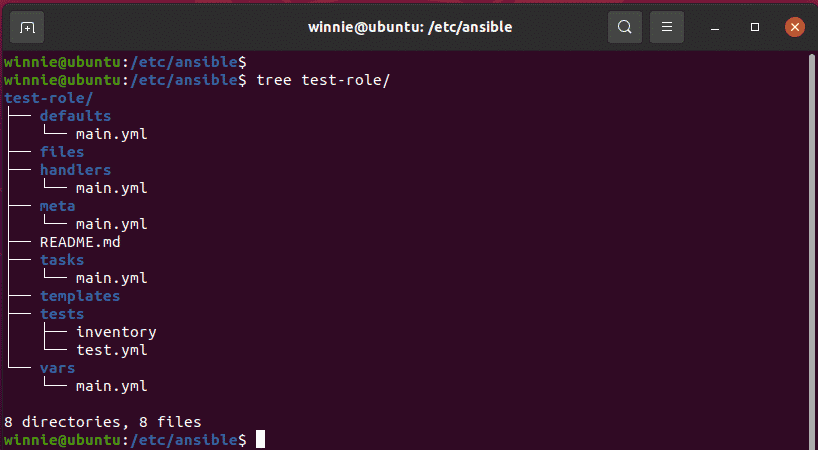
From the output, we get that the command spawns a test-role directory and by default, it contains some default directories. You can use the tree command to list them as shown.
$ tree test-role

Let’s have a brief overview of what each directory contains
The ‘defaults’ folder – This directory holds the default variables that will be required by the role. These variables have the lowest priority and are thus quite easy to override.
The ‘files’ folder – This folder comprises files to be copied to the managed or remote host.
The ‘handlers’ folder – The directory contains handlers that are usually evoked by the ‘notify’ directive. You can learn more about Ansible handlers.
The ‘meta’ folder – Consists of a role’s metadata for instance author, dependencies, etc.
The ‘tasks’ folder – It contains a YAML file that defines the list of tasks to be executed by the role itself. It contains the main.yml file.
The ‘templates’ folder – The directory comprises template files that can be modified as deemed fit to configure the role.
The ‘tests’ folder – Integrates testing with Ansible playbook files.
The ‘vars’ folder – Comprises variables that will later be used by the role. role. These variables have a higher priority compared to those in the ‘defaults’ directory.
We are going to create two roles for demonstration purposes:
The git role – This will install the latest version of Git.
The apache role- This will install the Apache webserver
Create them as follows:
$ sudo ansible-galaxy init git
$ sudo ansible-galaxy init apache
Thereafter, we need to define each role by editing the main.yml file in the ‘tasks’ folder in each role. Let’s start by defining the git role.
$ sudo vim git/tasks/main.yml
Define the task for the git role as shown.

Save the main.yml file and exit.
Next, define the task for the Apache role.
$ sudo vim apache/tasks/main.yml
Specify the task that installs the Apache webserver.

Likewise, save the main.yml file and exit.
Create a playbook file and call the roles
Once the tasks for each role have been defined in the main.yml file for each role, create a playbook file and reference the roles as shown.
$ sudo vim roles_demo.yml
NOTE:
You need to specify the full path to the role in the playbook.
roles:
- /path/to/role
In this example, the roles reside in the same directory as the playbook file, and simply calling them by their names does the trick.

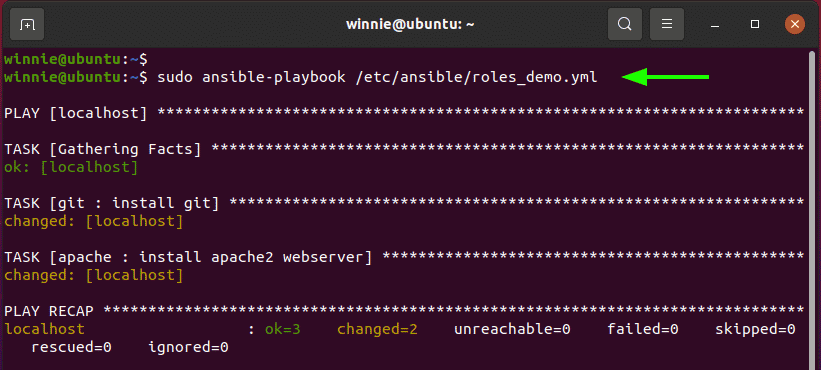
Then finally, run the playbook file.
$ sudo ansible-playbook /etc/ansible/roles_demo.yml
The roles defined in the playbook file will be referenced and their respective tasks will be executed. Here, Ansible installs both git and Apache webserver.

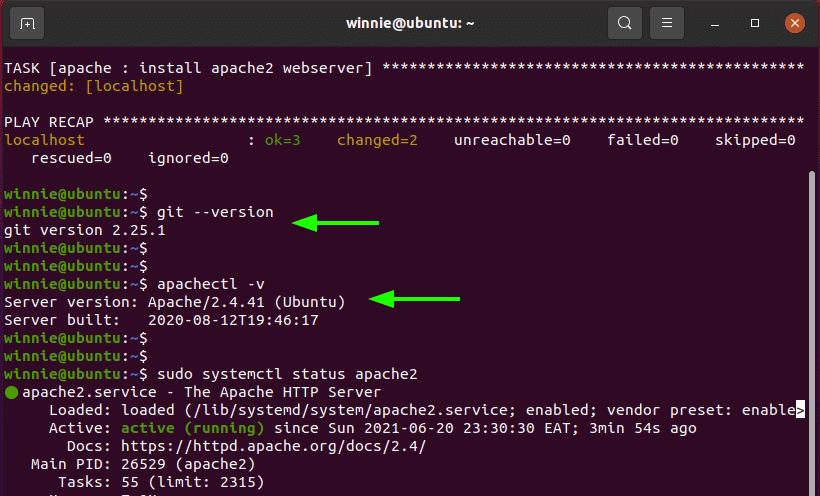
You can verify the installation by running the commands shown.
$ git --version
$ apachectl -v

As you have noted, the playbook file is brief and easy to follow along since the tasks have been referenced by the roles specified in the playbook file.
Summing up
Ansible roles help in the organization of playbook files and help avoid code duplication. They can be reused and referenced by other playbook files to execute similar tasks on different nodes thereby saving time and energy which could have been used in writing fresh playbooks. Overall, roles make work easier.


