Nginx is one of the top open-source web server and an HTTP load balancer. It is also used as a reverse proxy server and an HTTP cache. Nginx has gained popularity since its release because of its efficient resource utilization and responsiveness under load. It is faster at delivering static content while consuming fewer resources.
This post describes how to install Nginx on openSUSE Leap 15.3 system using two different methods.
Note: To install Nginx, you will require sudo privileges. Also, make sure that no Apache or other process is listening on ports 80 or 443.
Method#1
In this method, we will install Nginx available in the openSUSE default repositories. This is the easiest method, however, this package is an older version.
1. Run the command below to refresh your system repositories:
$ sudo zypper refresh
If prompted, enter the sudo password.

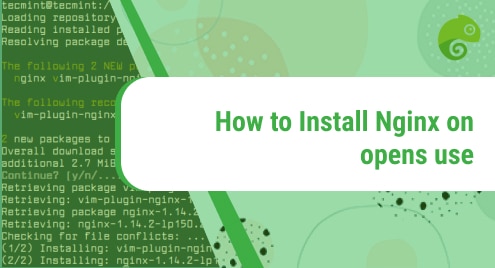
2. Then run the command below to install Nginx on your openSUSE system:
$ sudo zypper install nginx
Then you’ll be given details about installation, such as the packages that will be installed on your openSUSE system, their overall download size, and the disk space that will be used. After providing the details, you’ll be asked to confirm if you wish to carry on the procedure. Hit y and then the Return key to carry on.

Now Nginx will be installed on your openSUSE system.
3. Run the command below to enable the Nginx service:
$ sudo systemctl enable nginx

Then start the Nginx service through the command below:
$ sudo systemctl start nginx
To verify the status of Nginx, run the command below:
$ sudo systemctl status nginx
The output below indicates that the Nginx service is running.

To view the version of the Nginx package installed on your openSUSE system, run the command below:
$ sudo nginx -v
The output below indicates Nginx version 1.19.8 is installed on our system.

Method#2
In this method, we will install Nginx by adding the repository available at the openSUSE website. Through this method, you can have an updated version of Nginx on your system.
1. To install the newest version of Nginx on your openSUSE, add the repository using the command below:
$ sudo zypper addrepo https://download.opensuse.org/repositories/server:http/openSUSE_Leap_15.3/server:http.repo
If prompted, enter sudo password.

2. After adding the repository, run the below command to refresh the local repository index:
$ sudo zypper refresh
This command will prompt you to accept or reject the GPG key for the repository you have added. Type a and hit Enter to accept the GPG key.

3. Now you can install Nginx latest version through the command below:
$ sudo zypper install nginx
Then you’ll be given information about Nginx installation, such as the packages that will be installed on your openSUSE system, their overall download size, and the disk space that will be used. After giving the information, you will be asked to confirm if you wish to carry on the procedure. Hit y and then the Return key to carry on.

Now Nginx will be installed on your openSUSE system.
4. Run the command below to enable the Nginx service:
$ sudo systemctl enable nginx

Then start the Nginx service through the command below:
$ sudo systemctl start nginx
To verify the status of Nginx, run the command below:
$ sudo systemctl status nginx
The output below indicates that the Nginx service is running.

To view the version of the Nginx package installed on your openSUSE system, run the command below:
$ sudo nginx -v
The output below indicates Nginx version 1.21.6 is installed on our system.

Firewall Configuration
You will also need to configure the firewall to open the http and https ports used by Nginx.
To find the default zone in your firewall, run the command below:
$ sudo firewall-cmd --get-default-zone
In the output, you can find out your firewall’s default zone.
Then use the command below to open http port in your firewall:
$ sudo firewall-cmd --permanent --zone=public --add-service=http
Use the command below to open https port in your firewall:
$ sudo firewall-cmd --permanent --zone=public --add-service=https
You can replace “public” zone with the zone that is currently set as your default zone.
Then to apply the changes, run the command below:
$ sudo firewall-cmd --reload
Test
Now to test Nginx server, create an index.html file in the /srv/www/htdocs folder.
$ sudo nano /srv/www/htdocs/index.html
Add below lines in the index.html file:
html>

<body>

<h1>......Welcome to NGINX!......</h1>

</body>

</html>
Save and close the index.html file.

Restart the Nginx service through the command below:
$ sudo systemctl restart nginx
Now launch any web browser on your system and type localhost or your IP address in the address bar. If Nginx is installed correctly, you will see the following page.

Uninstalling Nginx on openSUSE
If you ever need to uninstall Nginx, you can do so using the command below:
$ sudo zypper remove nginx
If prompted, enter the sudo password. Then it will mention you the packages that will be uninstalled from your openSUSE system and the disk space that will be freed. Then you’ll be asked to confirm if you wish to carry on the procedure. Hit y and then the Return key to remove Nginx from your openSUSE system.
Through any of the methods shared in this post, you can easily install Nginx on your openSUSE system. The method to uninstall Nginx is also described at the end of this post if you ever need to remove it. Visit how to install Nginx on Ubuntu and CentOS, if you are running these Linux distributions.

Karim Buzdar holds a degree in telecommunication engineering and holds several sysadmin certifications including CCNA RS, SCP, and ACE. As an IT engineer and technical author, he writes for various websites.